How to tie the Balanced Bottom Bait Rig
Find tying a neat 'D' rig presentation all too fiddly? Then you need to follow this guide...
Just follow this step-by-step guide...
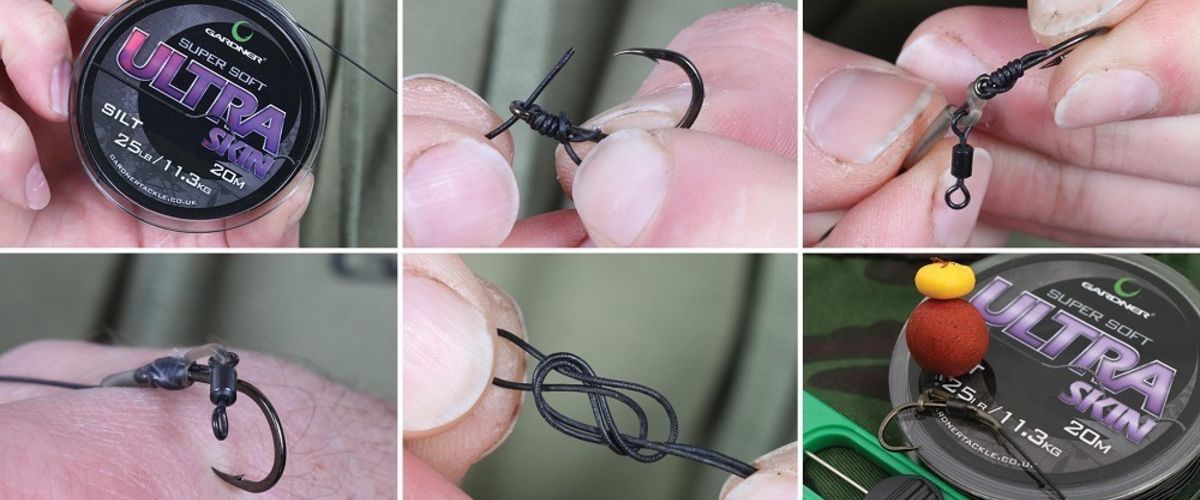
1. Here’s the items you need to tie this awesome bottom bait presentation: hooks, micro swivels and some Hook Aligners.
2. Mount a size 12 swivel onto a Gardner Pop-Up Hook Aligner (use a Large Hook Aligner for size 6 hooks as shown).
3. Take 40cm of a supple, sinking skinned hooklink – we’re using Ultra Skin for this, but any softish material will be fine.
4. Don’t bother stripping it. Simply attach the hook with a simple Knotless Knot (five turns is more than enough).
5. With the Knotless Knot, always have the hooklink coming through the eye towards the hook point (as shown here).
6. Using a boilie needle, thread the Pop-Up Hook Aligner onto the hooklink with the D nearest the hook as we have.
7. Carefully push the Pop-Up Hook Aligner up over the eye so that the D sits squarely on the back of the hook…
8. The end of the D should be sitting level with the hook point. If it looks like this then you won’t go far wrong!
9. The gentle angle of the Hook Aligner helps the hook to flip more aggressively and gives much better hook holds.
10. To attach the rig, tie a Figure-Of-Eight-Loop Knot. Lubricating it with saliva and then pulling it firmly down.
11. To further enhance the way the hook twists, remove a section of skin 2-3cm from the hook to create a hinge.
12. Add a small amount of putty as shown – as the added weight helps the hook to pivot and react even faster.


