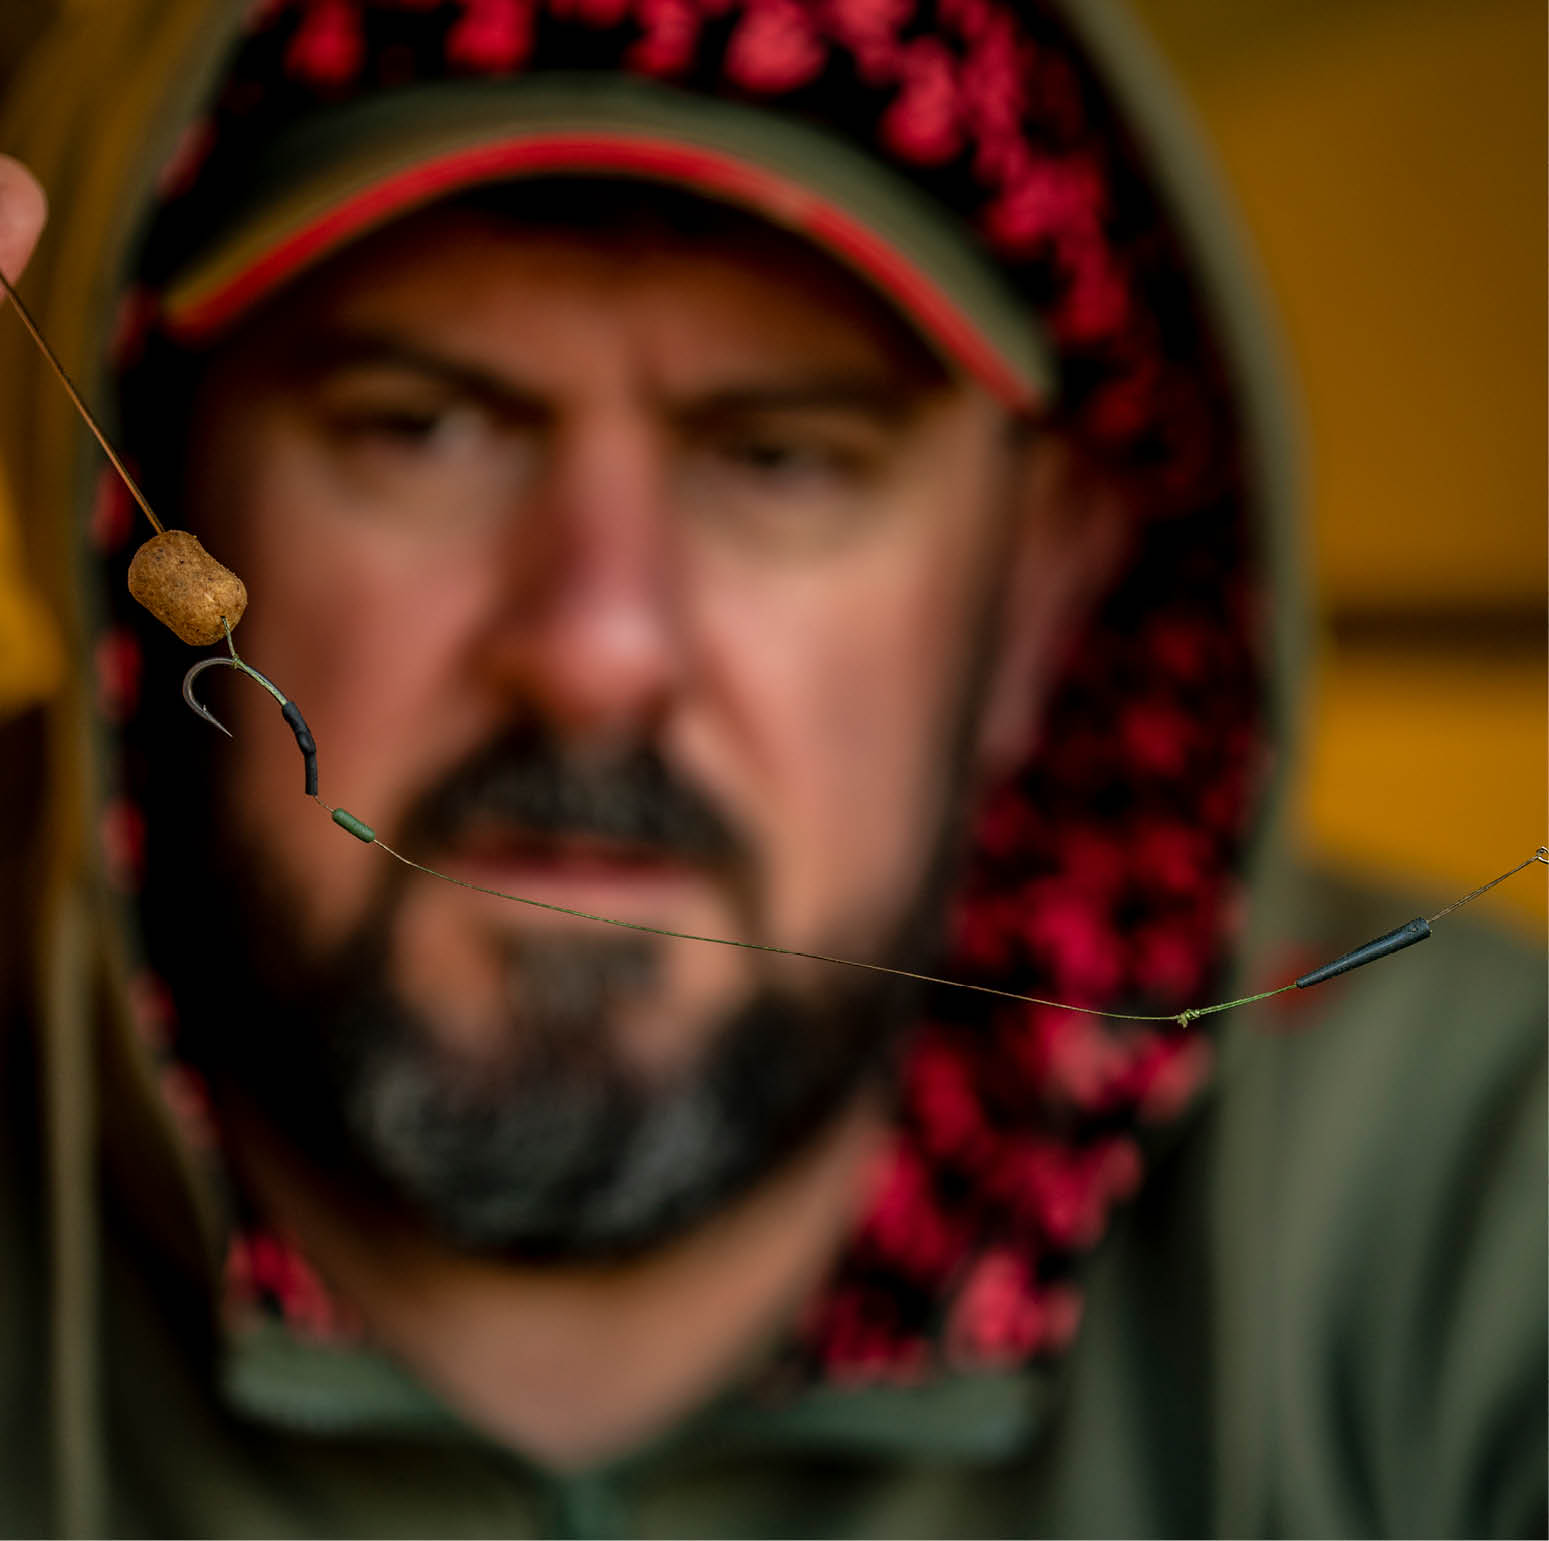
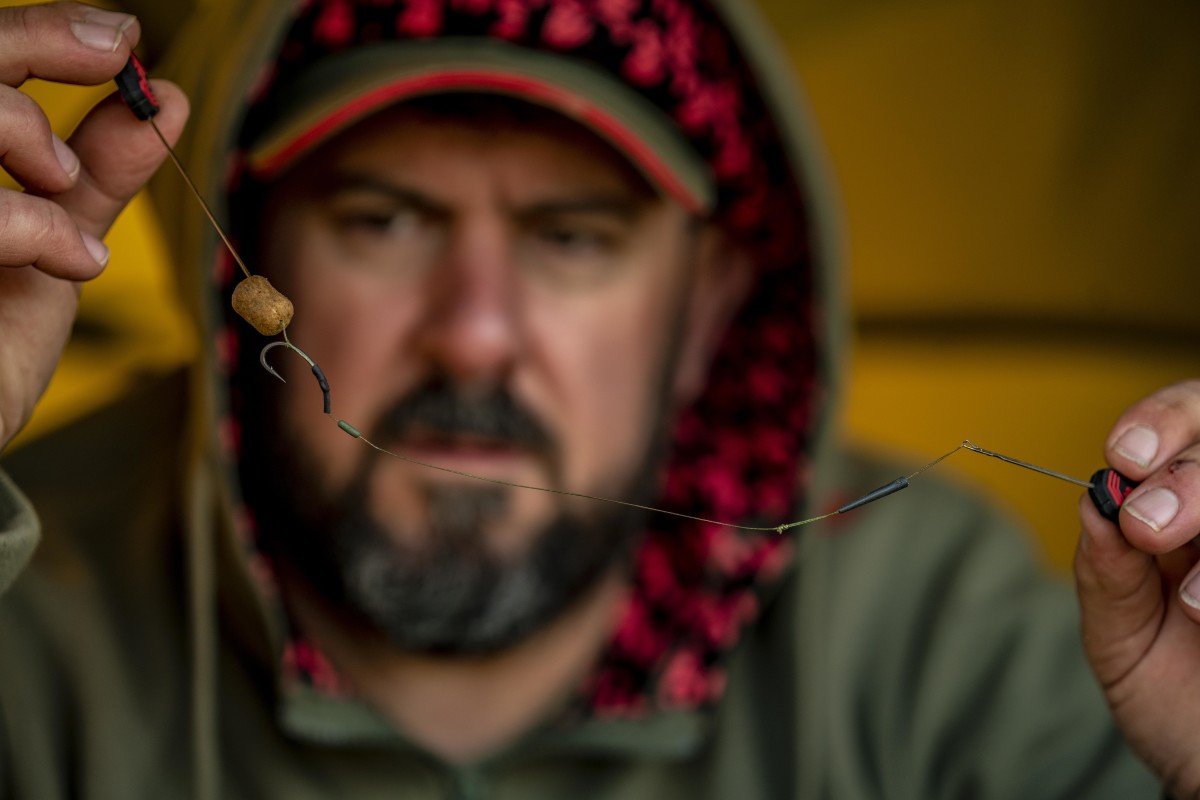
Andre's Bottom Bait Braided Rig
Who uses a bottom bait these days, let alone one which is attached to a braided hooklink material?! André likes to keep things simple—and different to the norm...
What you need:
Kurve Shank hook
Supple Braid in Combo Camo in 25lb
Shrink Tubing
Tungsten Sinker
Anti-Tangle Sleeve
Puller Tool
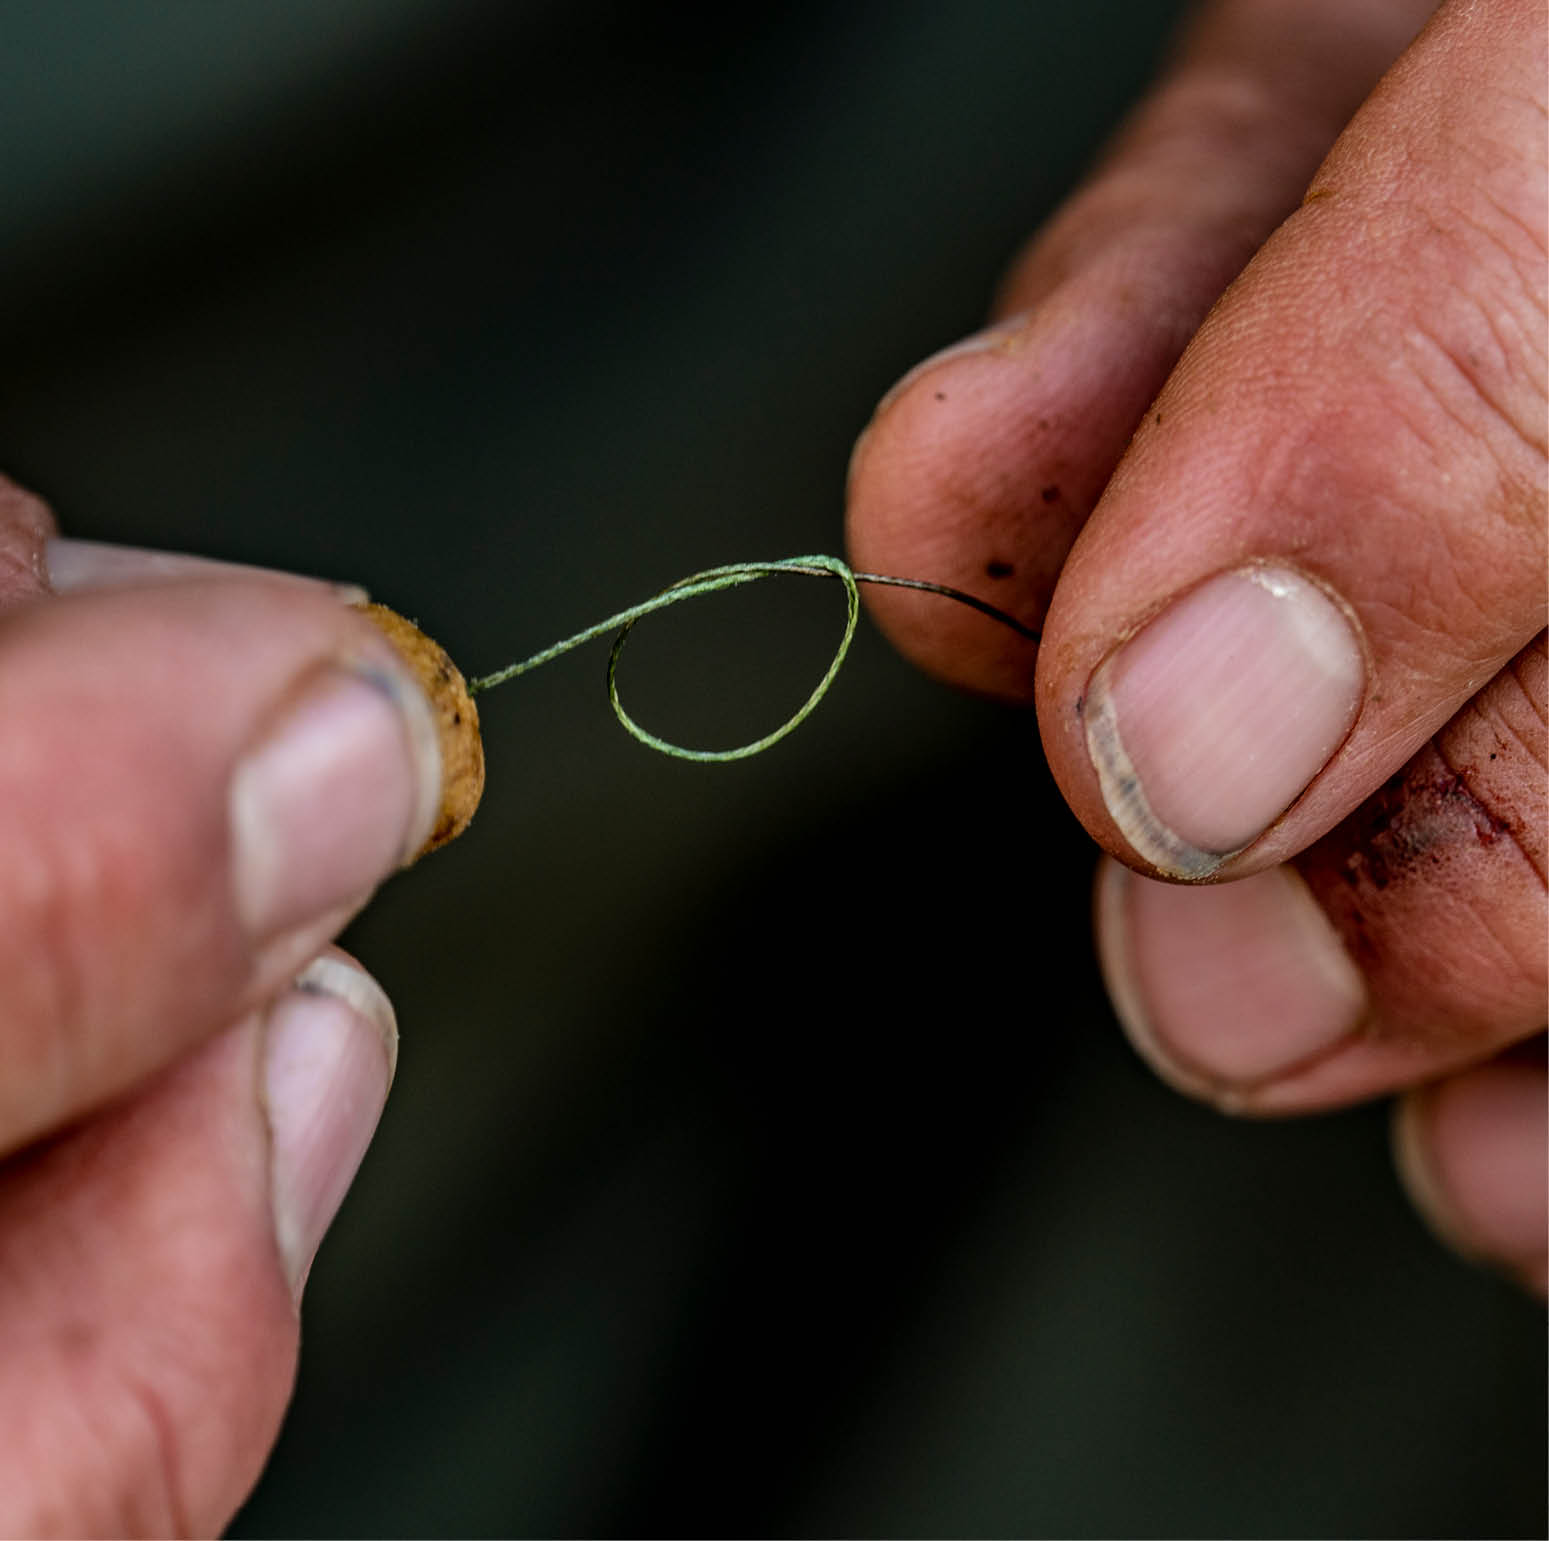
1. Start by tying a small Hair loop in the end of your hooklink material.
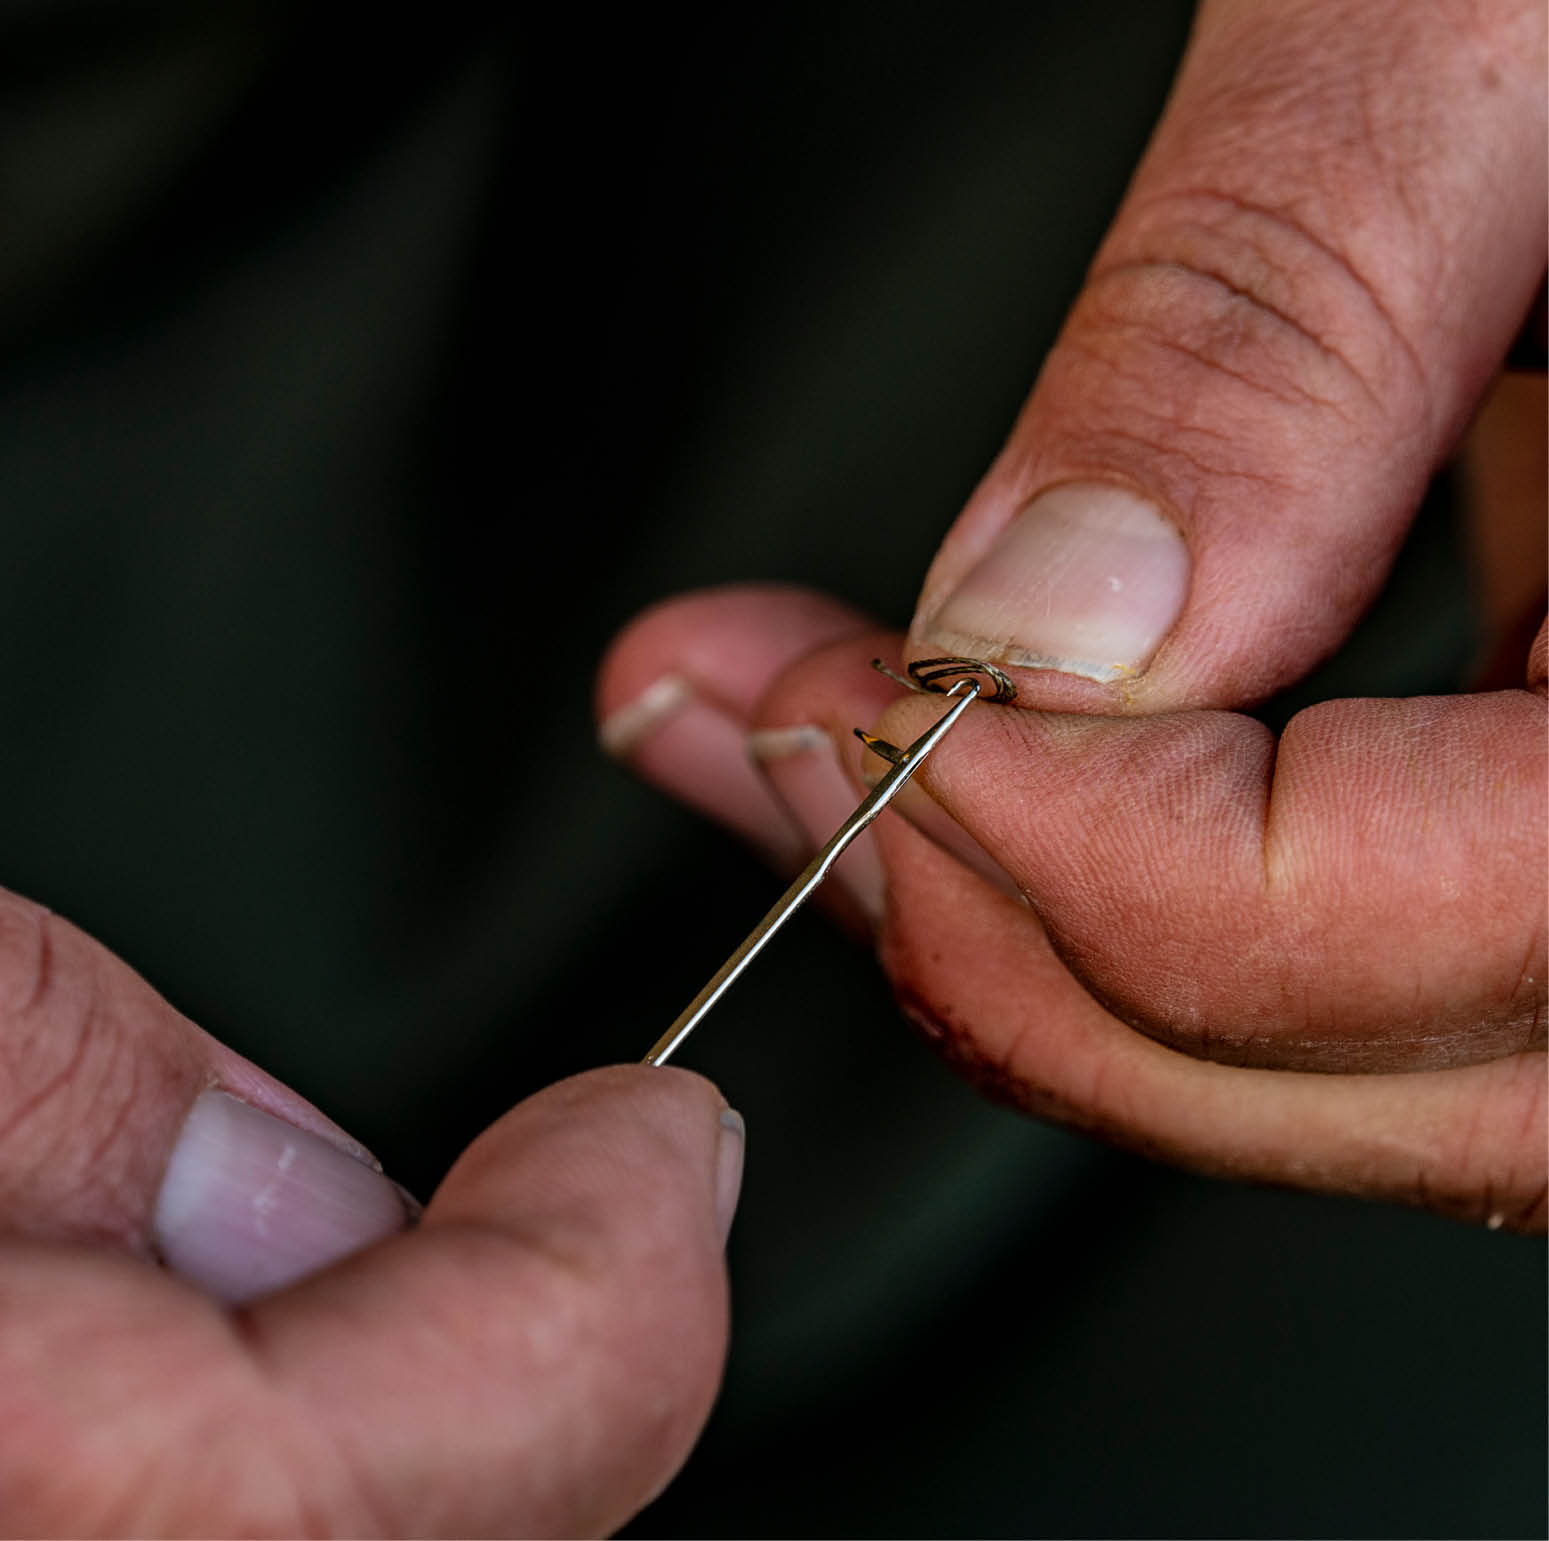
2. Attach your hookbait and then form an Overhand knot like so.
3. Pass your hook point through the loop and tighten down as shown.
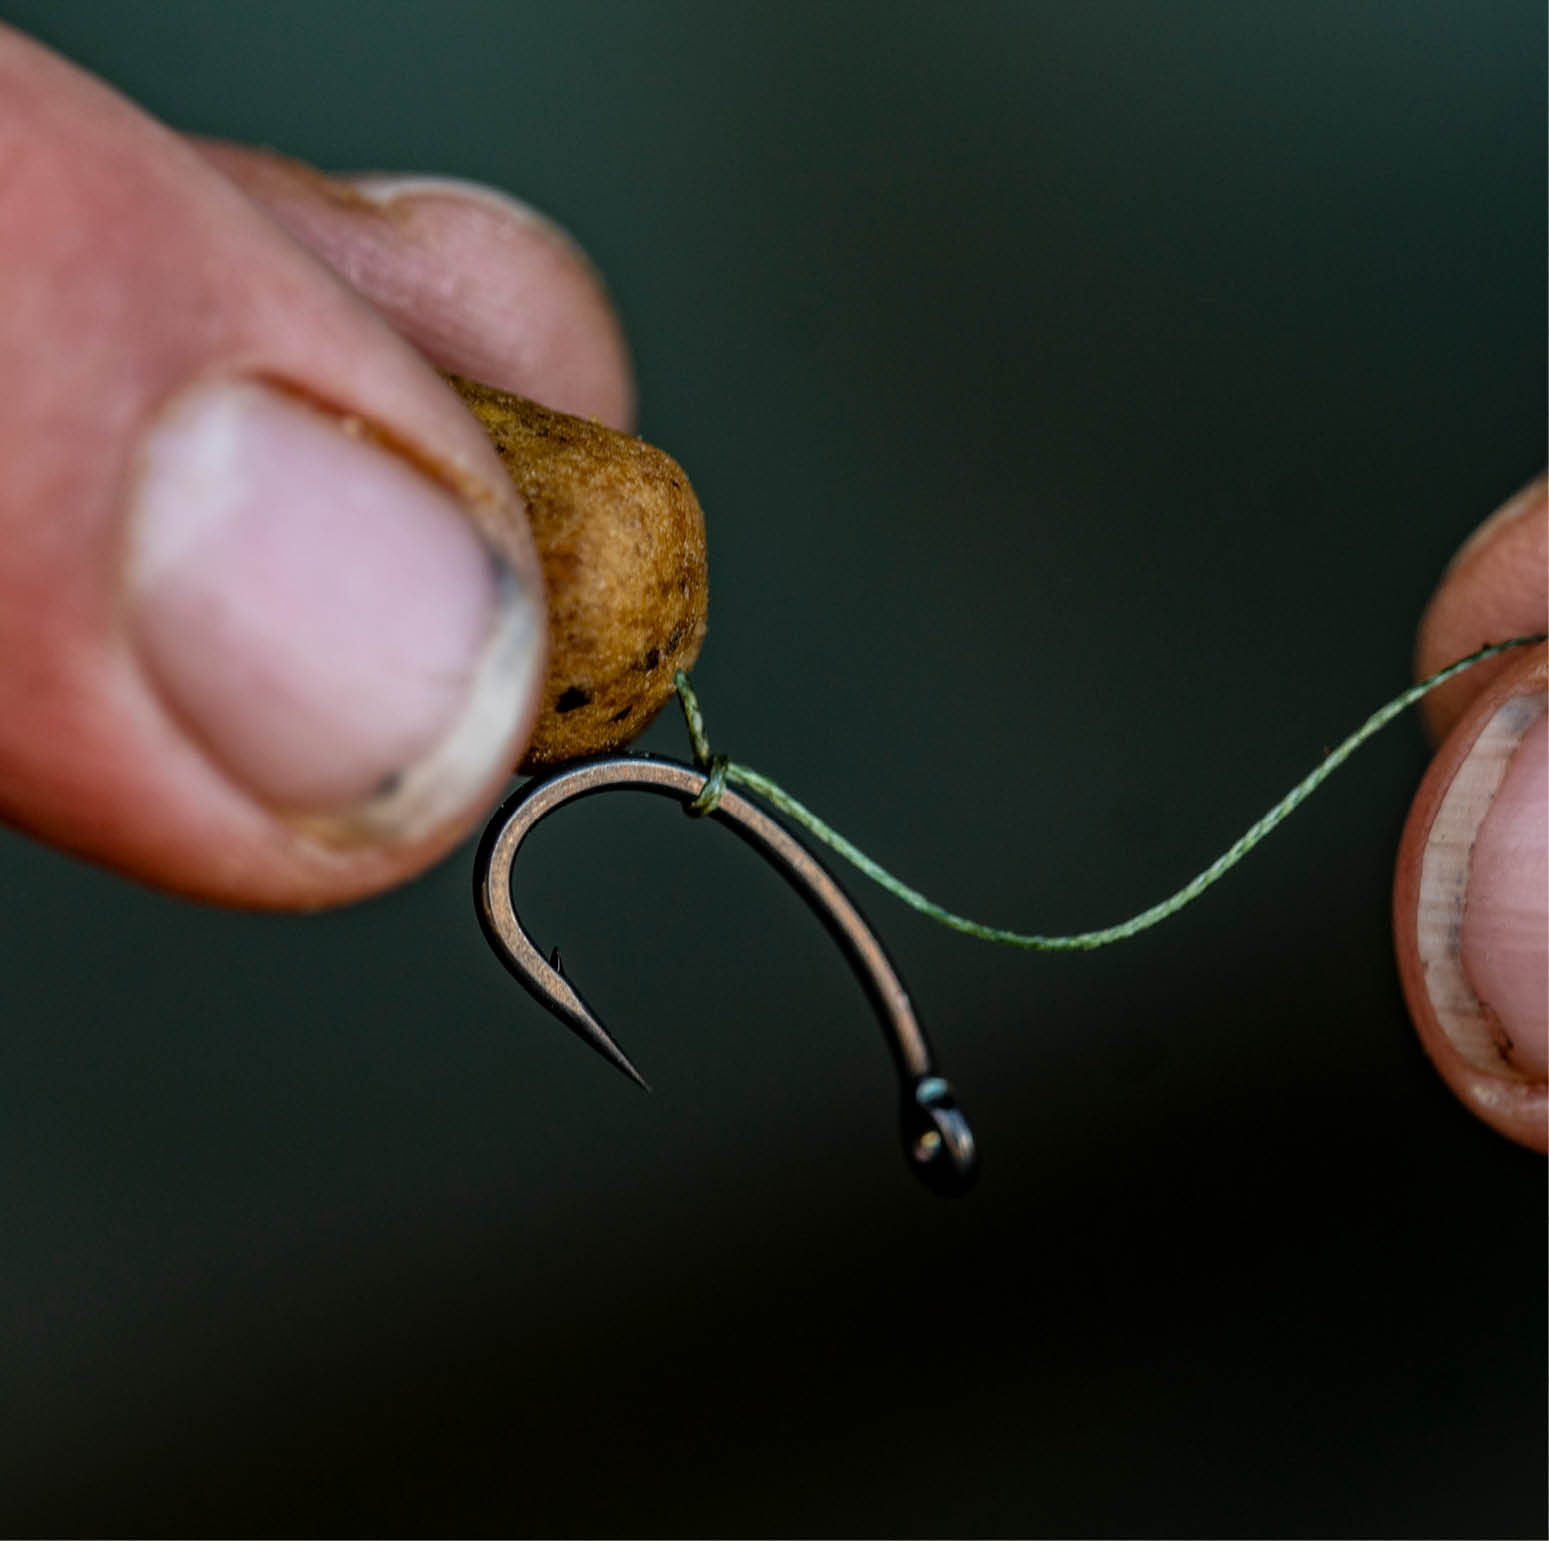
4. Secure the hook with a Knotless Knot, making a couple of turns under the Hair to prevent it from moving when the rig is tightened.
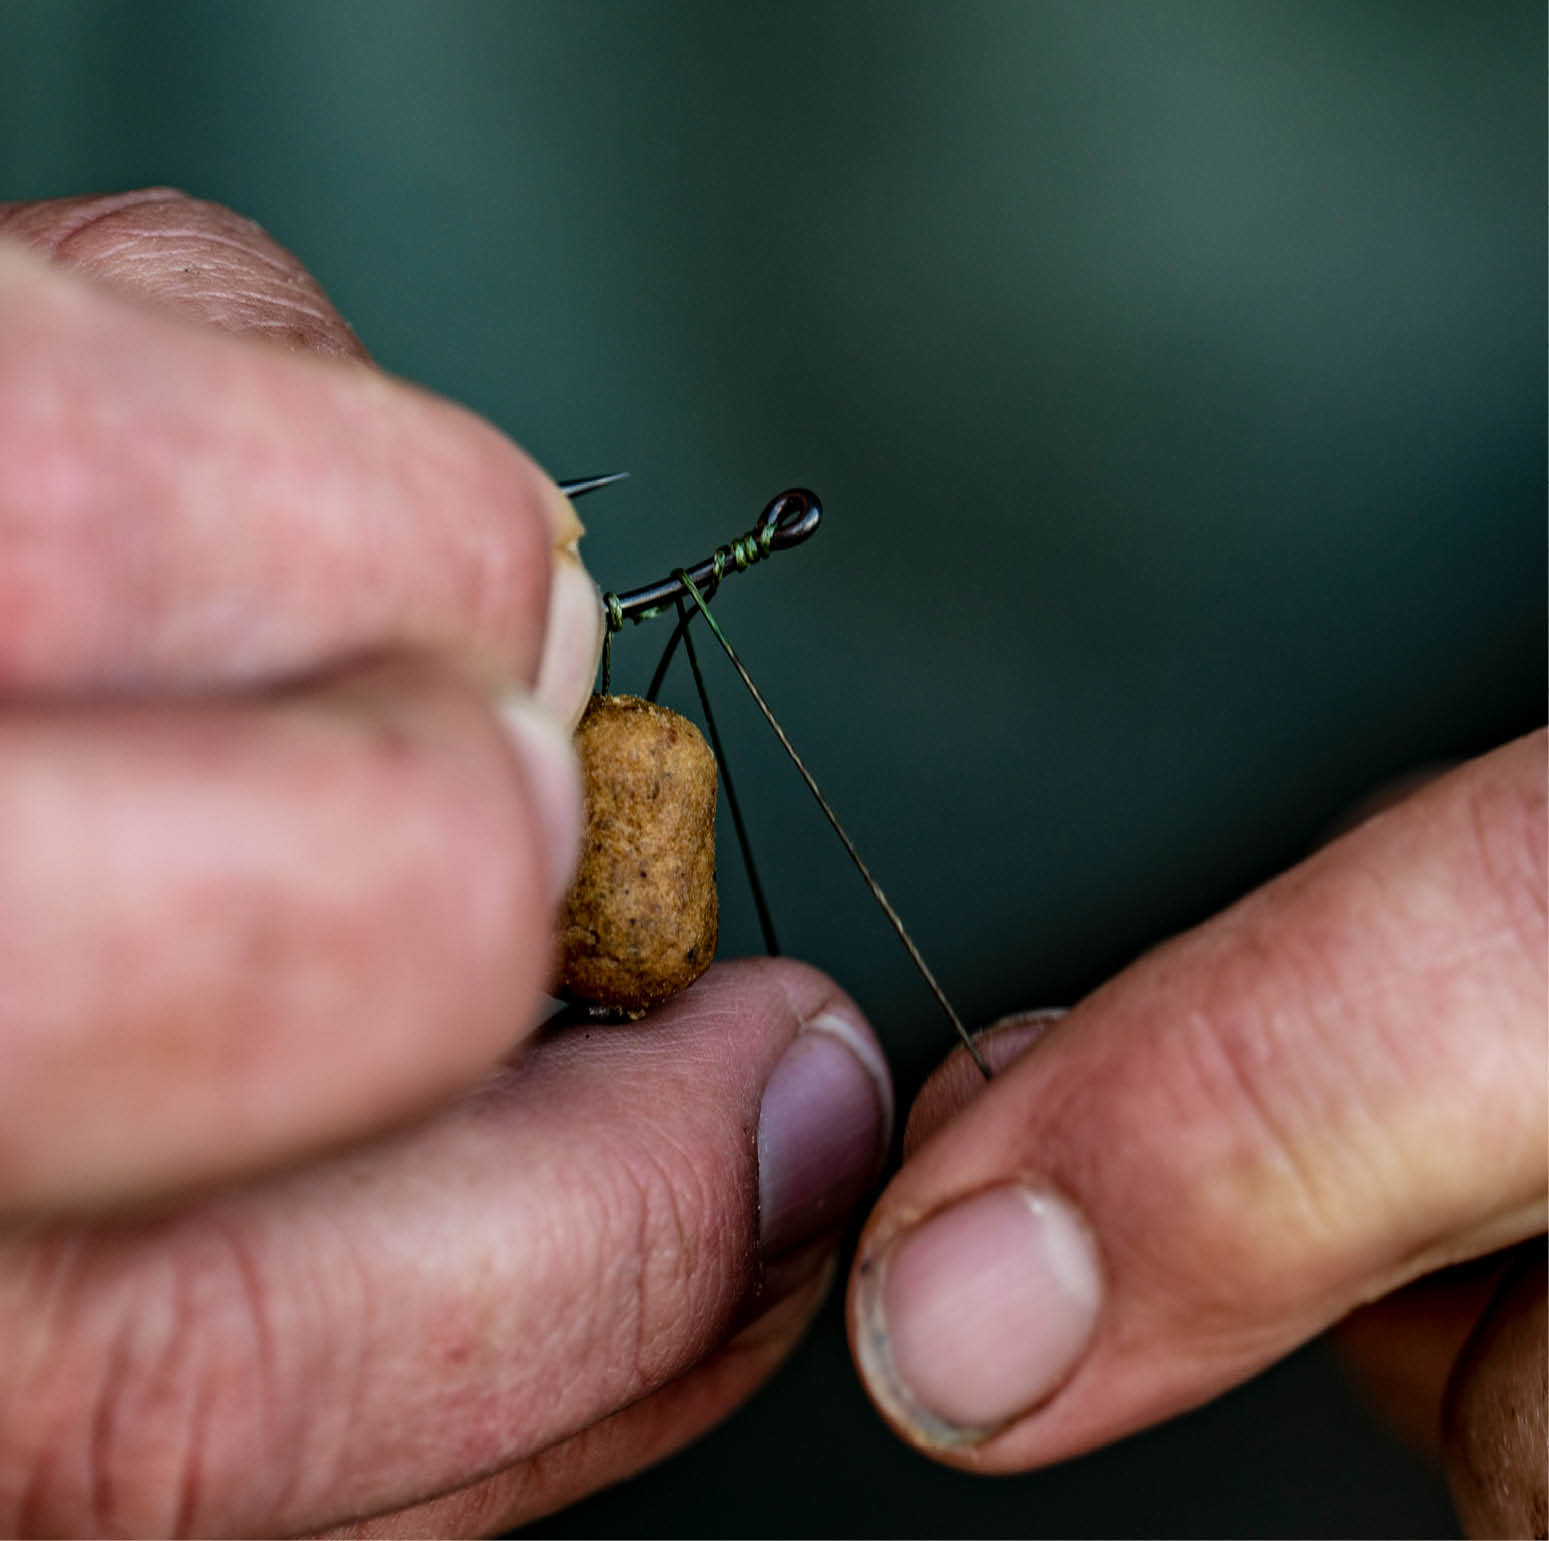
5. The finished hook section—it should look extremely neat and tidy.
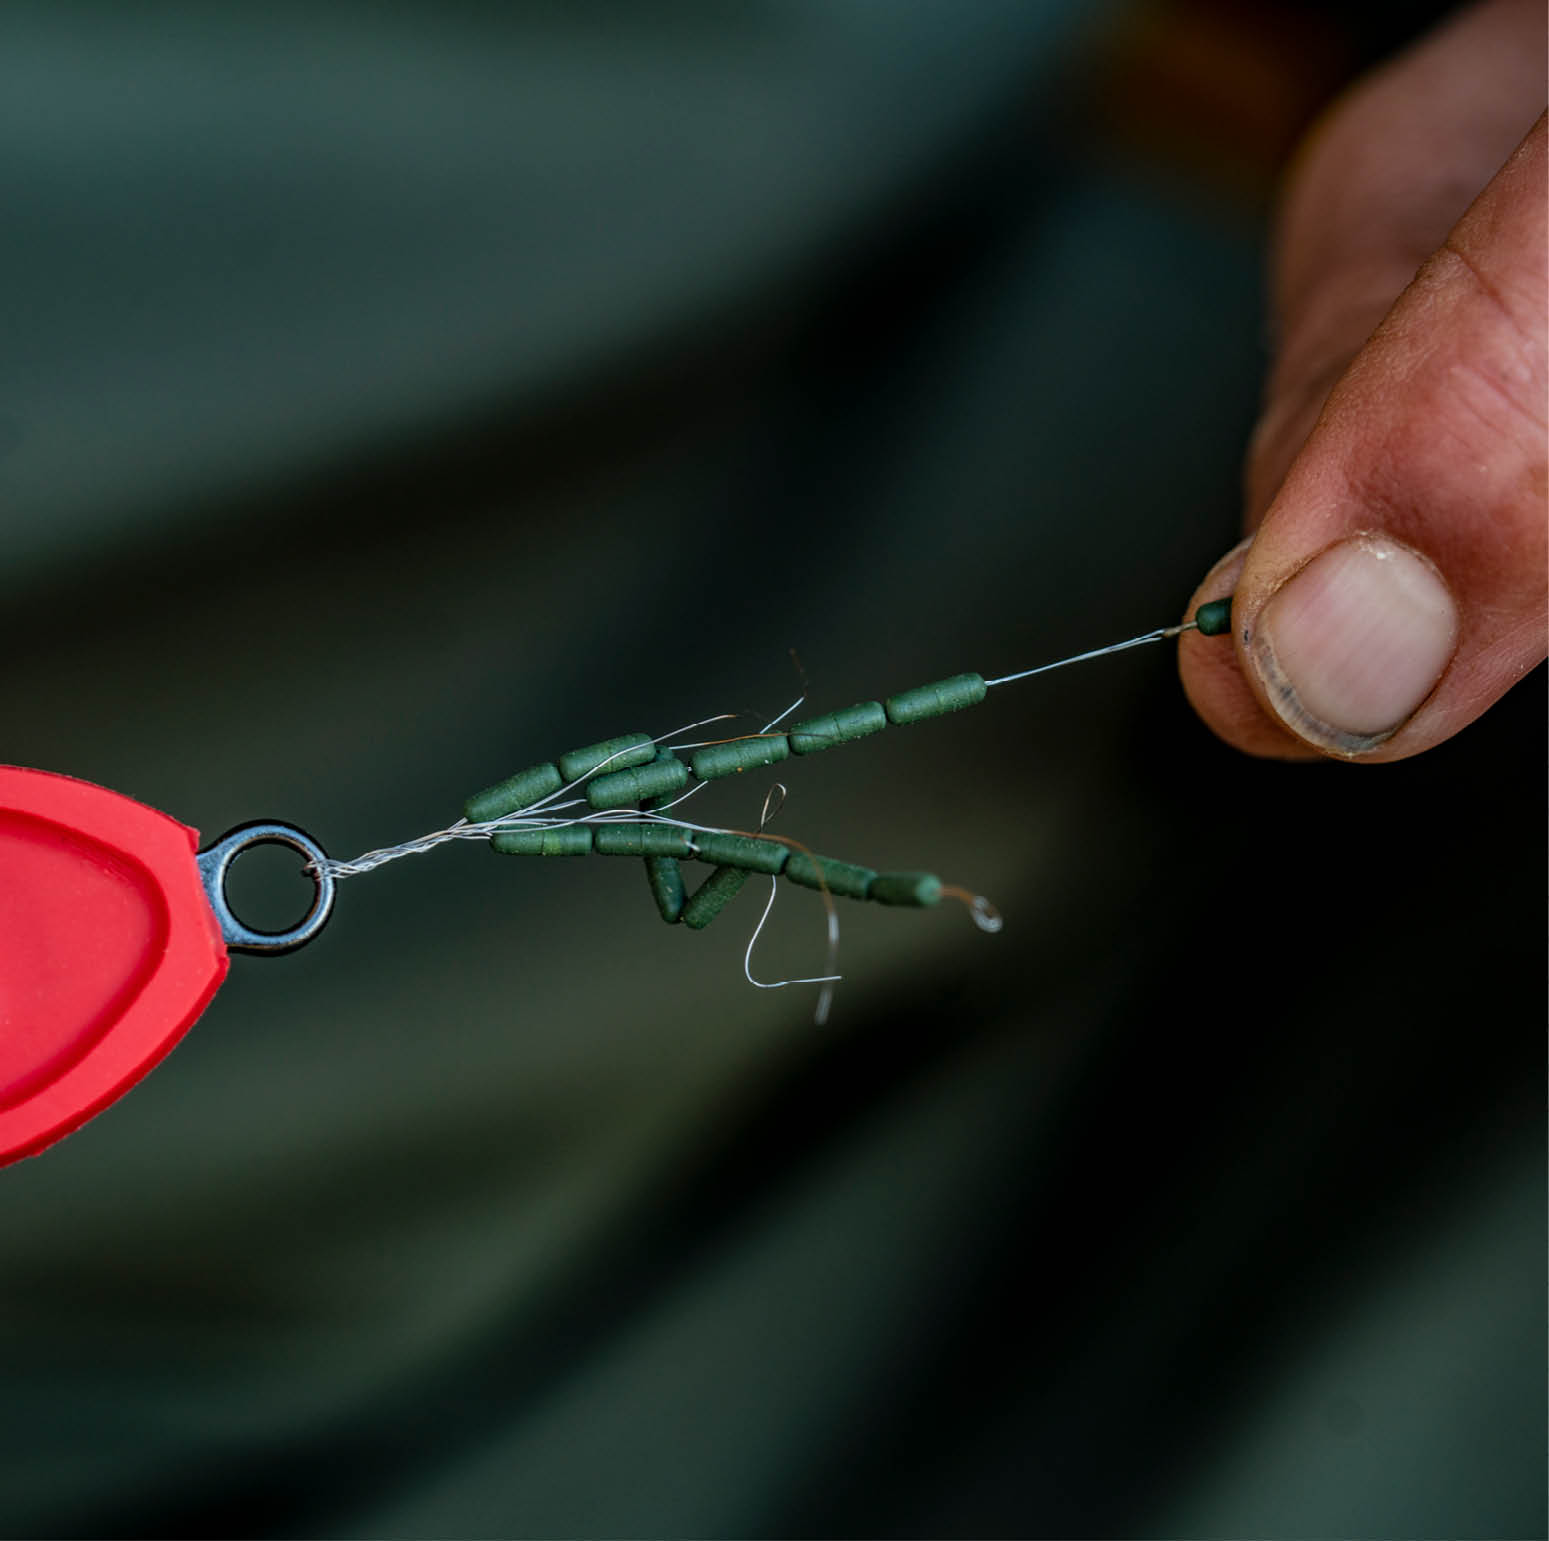
6. To help the rig lay flat on the lakebed, Andre adds a Sinker to the hooklink.
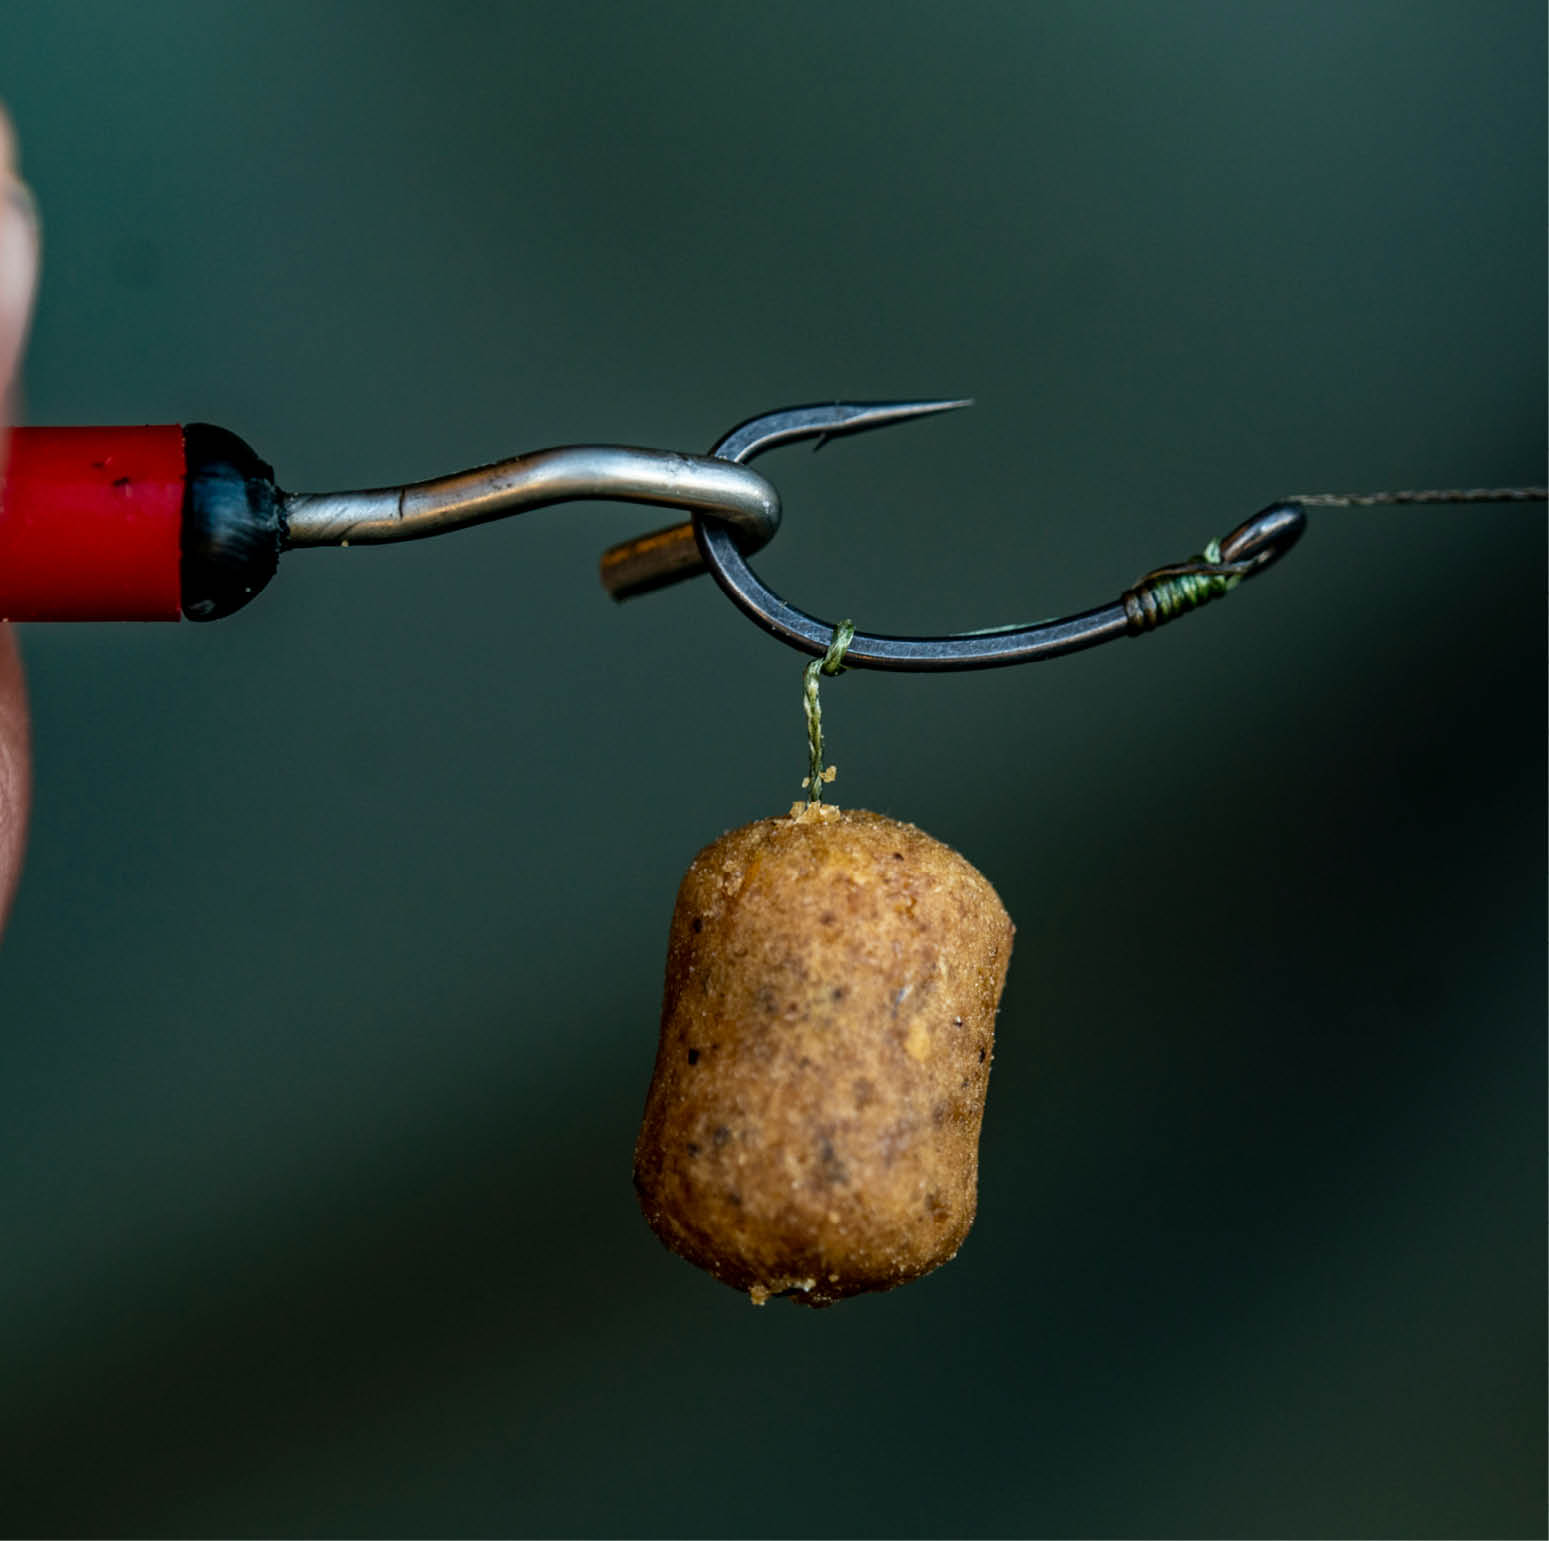
7. A short shrink tube kicker is then added to the hook and shrunk down.

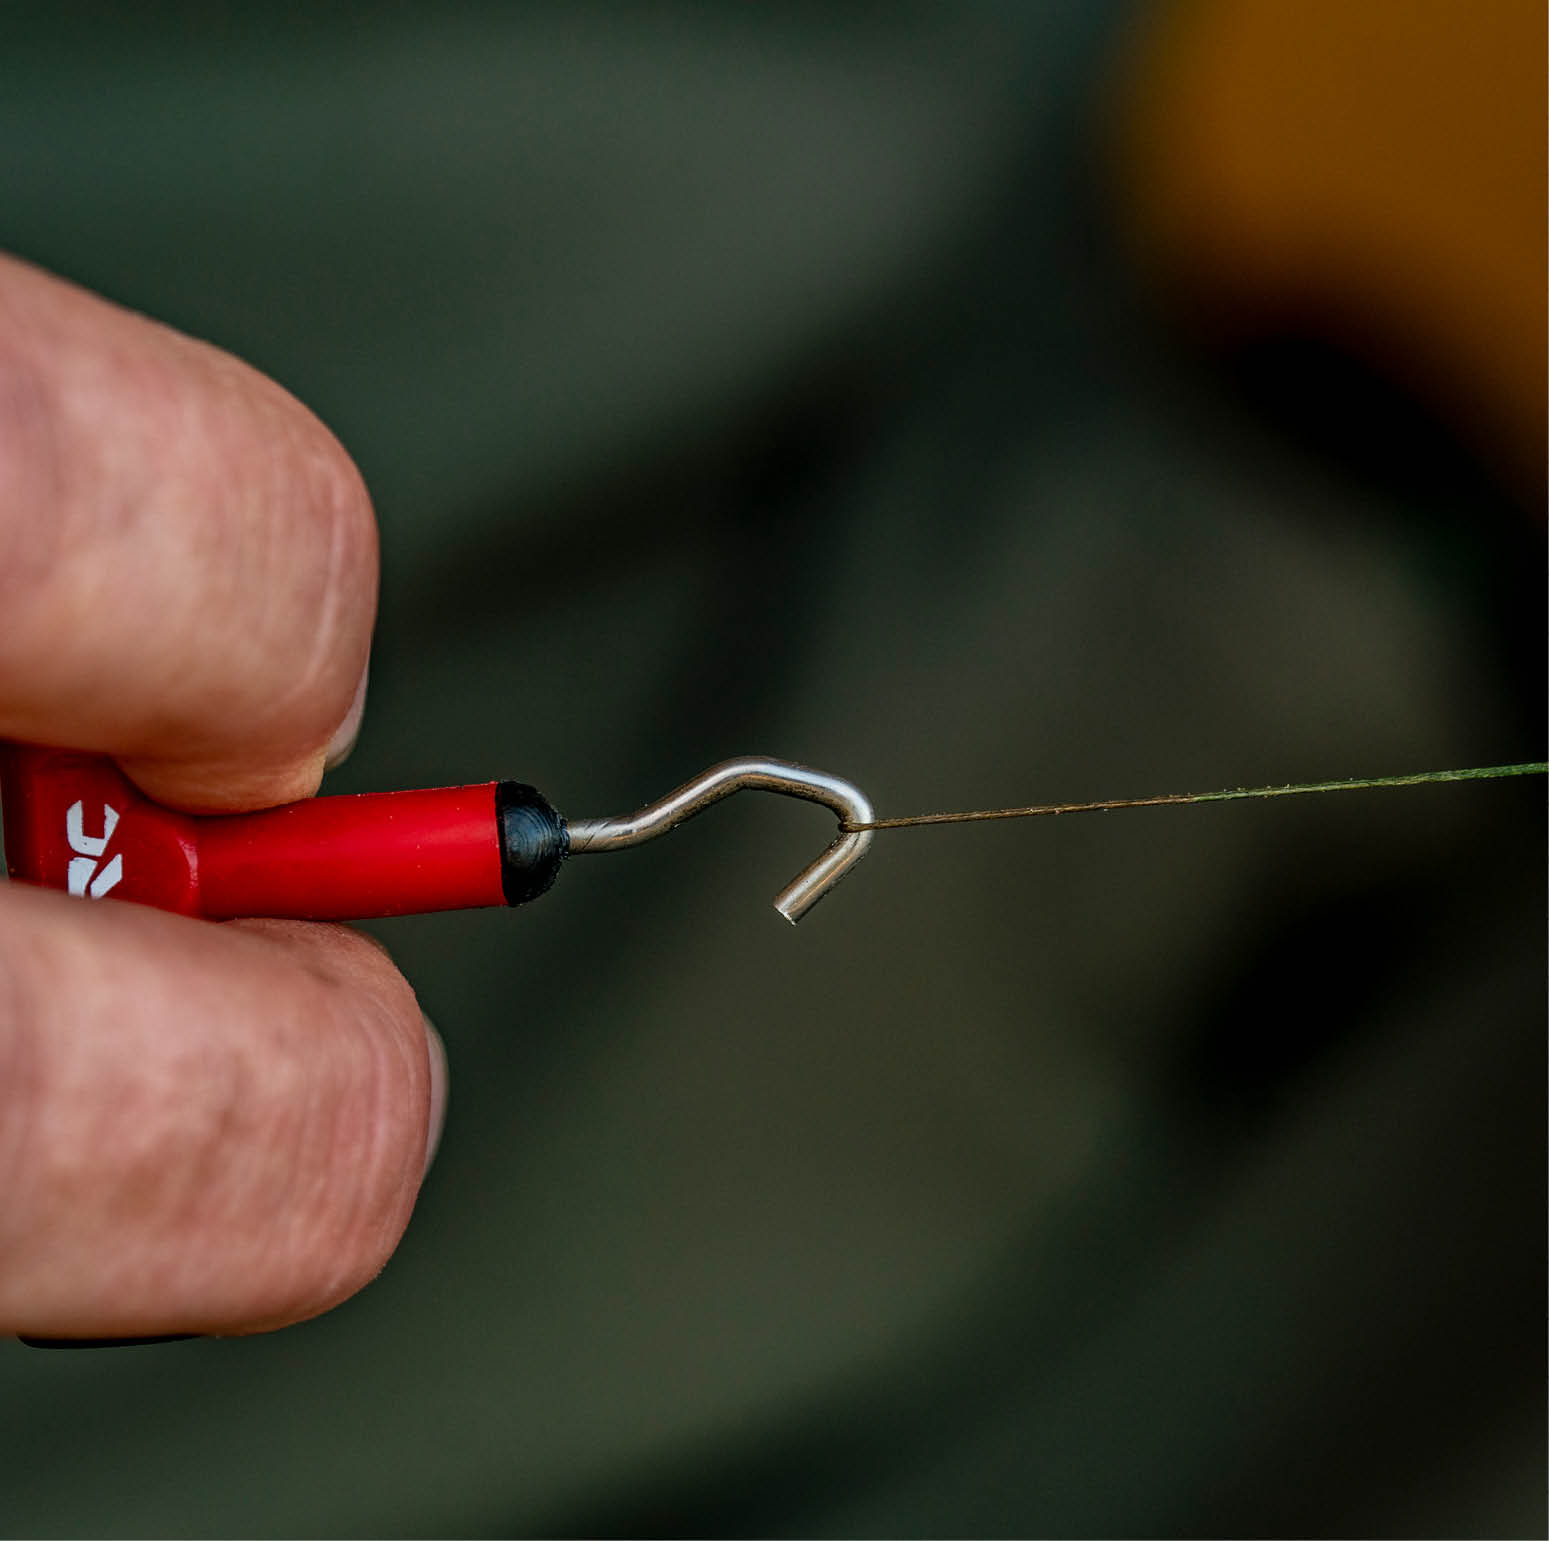
8. At the other end of the hooklink, form a Figure-Of-Eight Loop knot.
9. Thread on an Anti-Tangle Sleeve—this will help combat tangles.