The Flipper Rig
Lewis Read explains everything you need to know, and perhaps more about the Flipper Rig.
There’s little doubt that tying carp rigs that offer consistent mechanics with balanced and buoyant hookbaits, is pretty straightforward. No, scrub that… it’s a bleedin’ doddle! Achieving the same level of control and consistency with straight-out-the-bag bottom baits, however, has always been a far trickier proposition altogether. There are just so many variables that can contrive to undermine the way the rig lays out, all of which potentially inhibit its hooking potential. In my head, it’s always been a minefield.
As ’Ology readers may have deduced whilst reading this series of articles, almost all my personal favourite rigs rely on the inherent buoyancy of the hookbait countering the weight of the hook. Therefore, the hookbait and components work together in harmony to control the relative orientation between them as the rig settles on the lakebed, with the hook on the bottom and hookbait coming to rest perfectly just above it. That way, life is all good, and I can descend into a deep slumber at night, content and assured that the rigs are laying out perfectly, primed and ready to react unimpeded when I need the rig to do its job.
Perhaps this in itself is the reason why I have been a late bloomer in terms of using the Flipper Rig—my obsessively compulsive, and completely unhealthy obsession with ensuring that rigs settle perfectly and kick out every time they hit the lakebed, is a mindset which has simply and steadfastly blocked my capacity to cast one out, most of the time.
When we’re fishing over large beds of bait or spreads of nice big boilies, a match-the-hatch hookbait offers distinct benefits in terms of subtlety, with them blending in visually with all the other free food, and its density. It’s a scenario which fills my big-carp confidence bank to the maximum, far more so than use of a contrasting hookbait—despite me knowing that contrasting hookbaits are also time-proven.
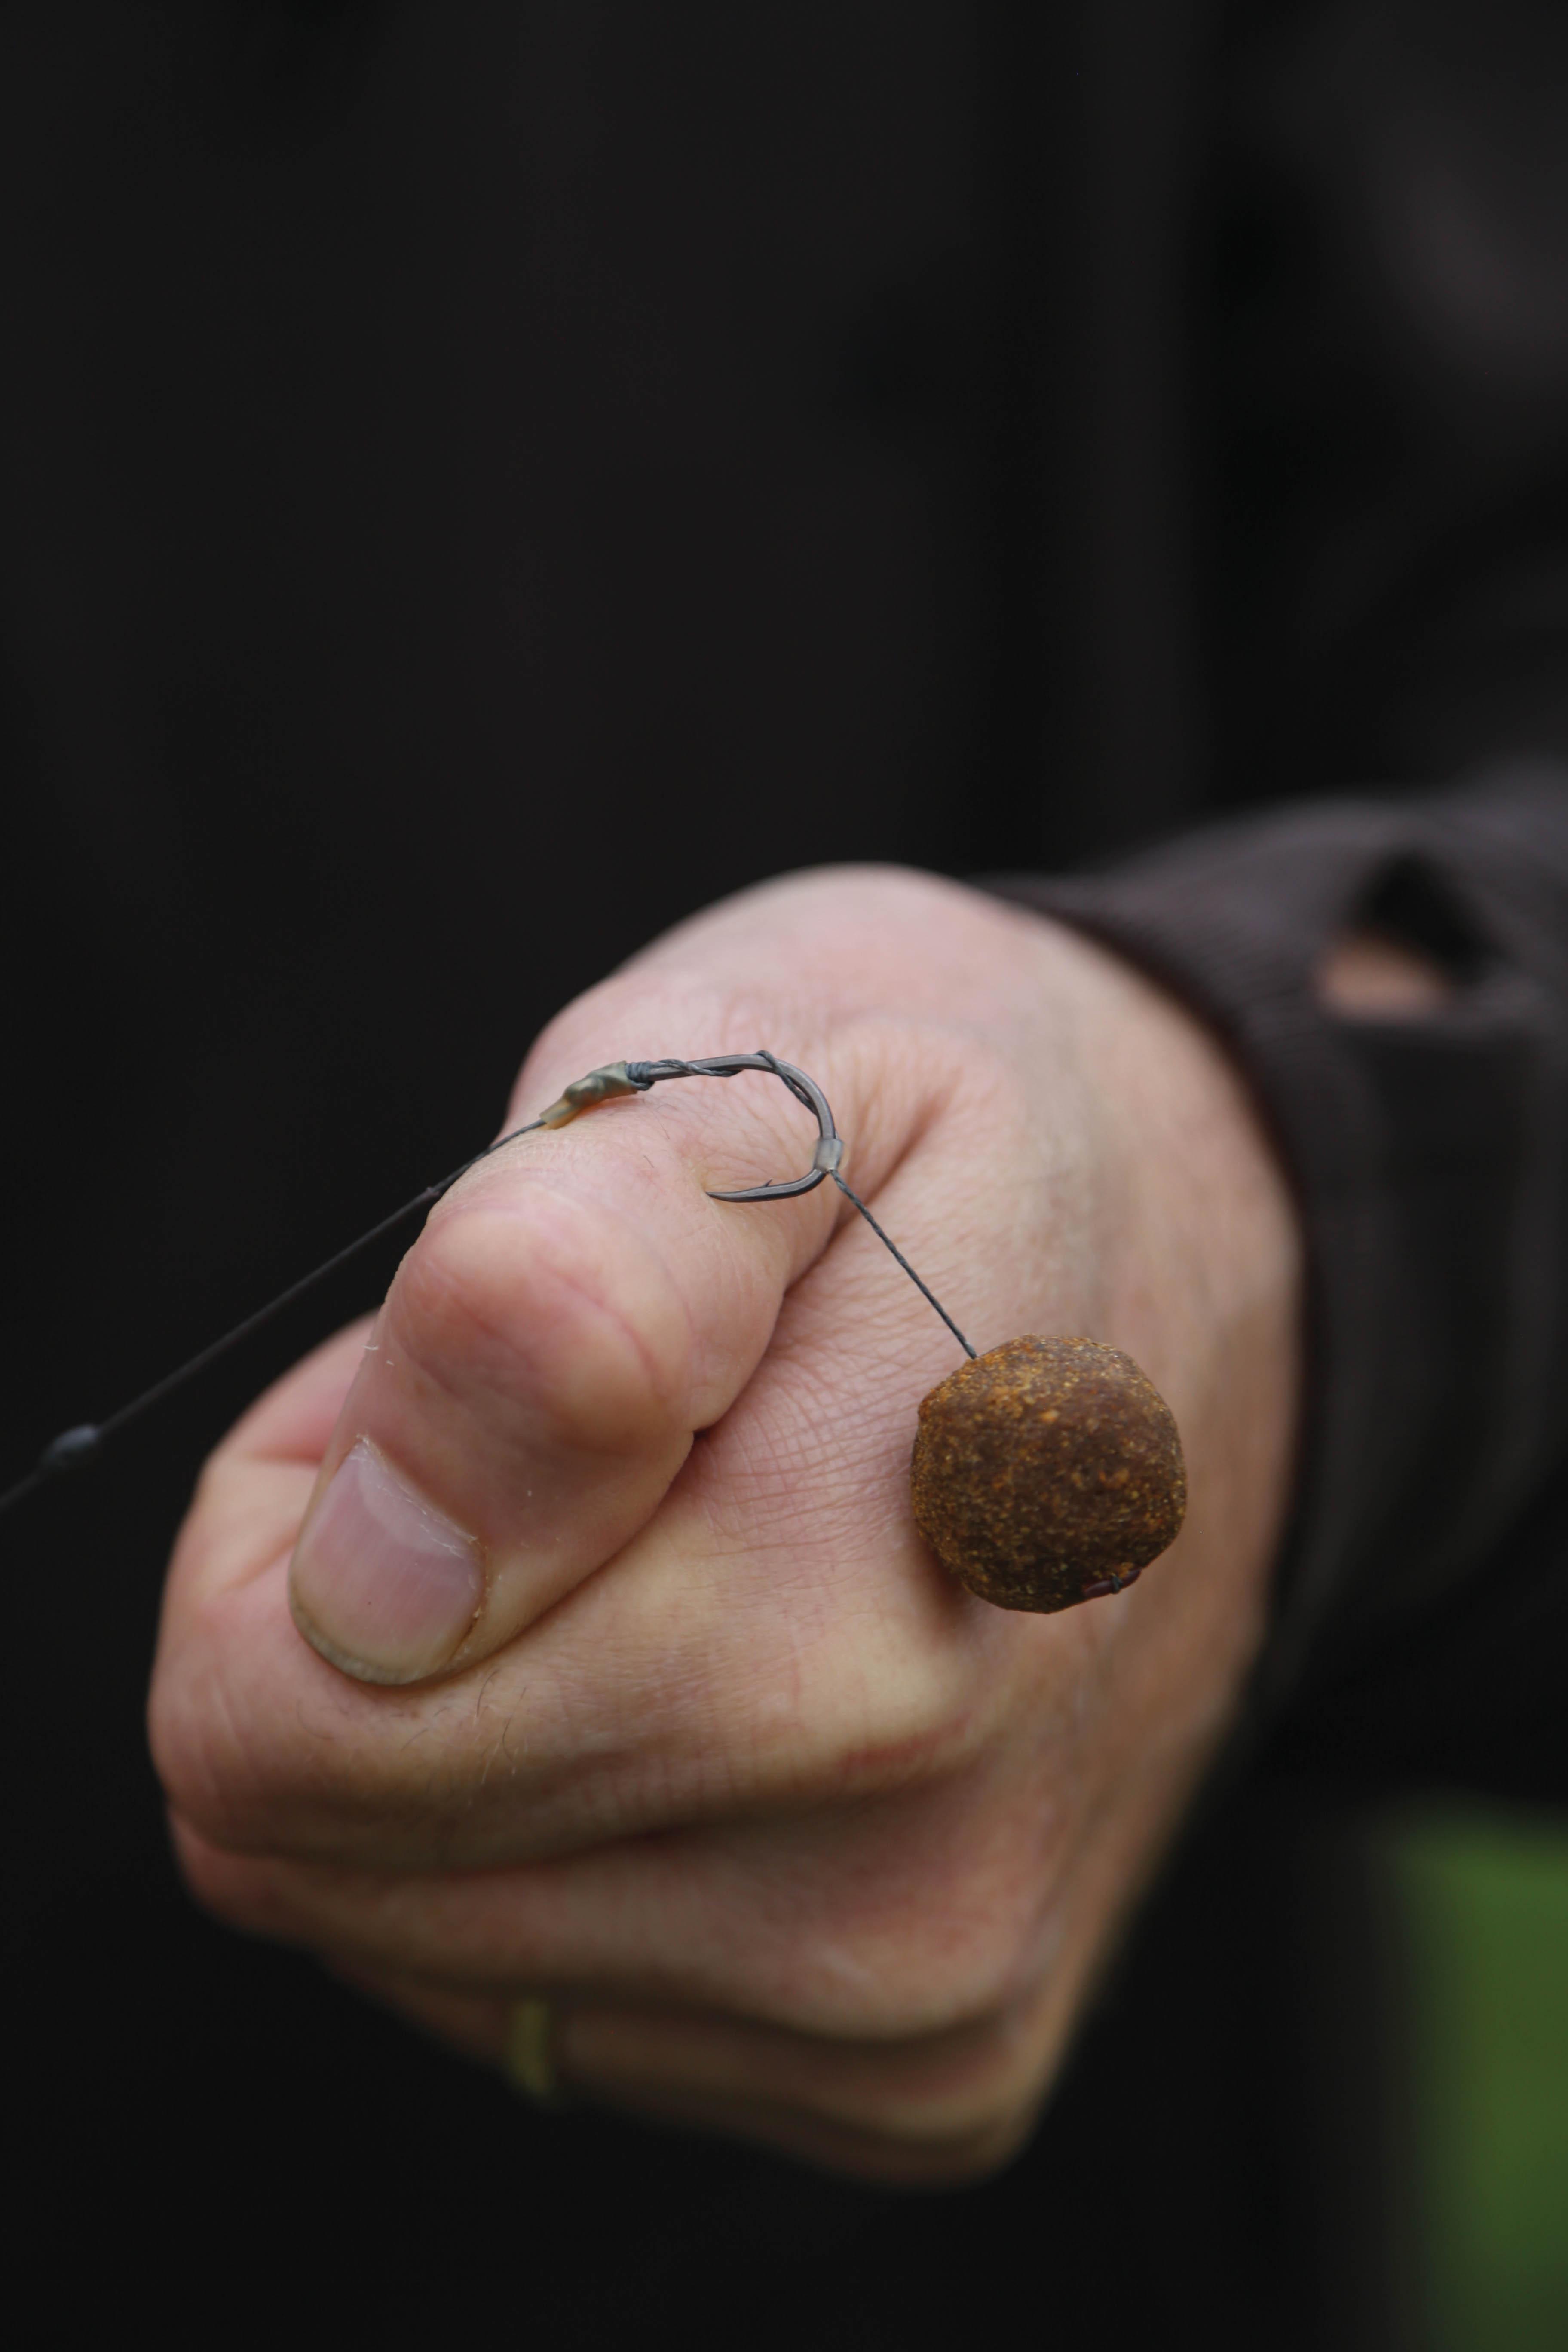
Big carp displace a lot of water when they start shuffling about whilst working a spot, and anglers far greater than I will ever be have often reported observing fish avoiding a balanced hookbait which wafts about a little too readily after they have noticed the bait behaving unnaturally, despite it being tethered to a perfectly tied link. Yes, there are certainly times when a nice, heavy bottom bait brings advantages. In essence, the Flipper Rig uses the bait’s inherent weight to enhance its effectiveness, its weight dragging the hook point down towards the fish’s lip the moment that hooklink tightens.
By having that simple adjustment working in harmonious concert with the short, angled kicker—which forces the hook to react as the hook flips over the carp’s big, rubbery bottom lip—you end up with a rig that offers remarkable consistency.
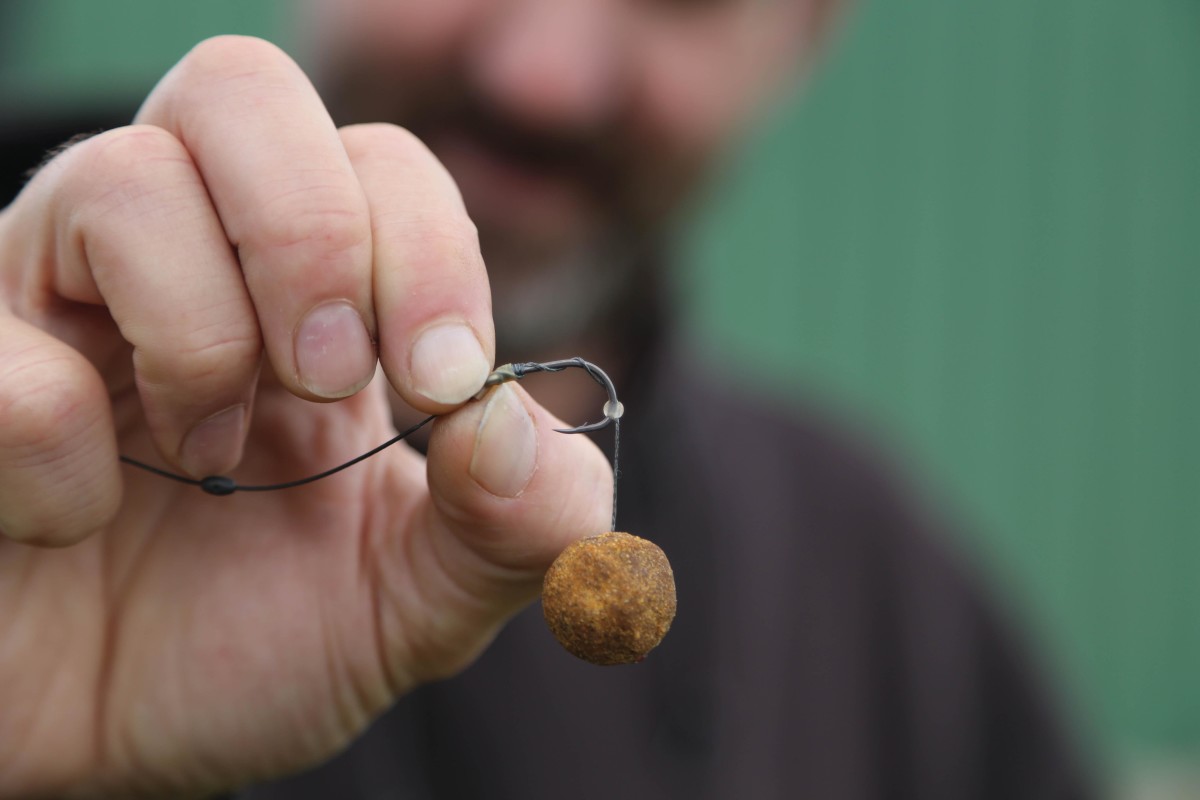
The Flipper’s mechanics are achieved by us trapping the Hair round on the bend—virtually at the base of the hook point itself. Having the Hair trapped in this position on the bend (simply by using some 0.5mm silicone) means that the Hair will hold position for the cast, whilst being free to slide backwards as the hook penetrates (or as the rig is ‘done’, which in itself is a very helpful telltale sign).
Another big benefit of having the Hair trapped in this position, is the resultant abject lack of tangles. Everything naturally hangs tidily and lays out nicely aligned, ensuring that the rig rarely tangles—especially in the hands of a fastidious angler like you, with your attention to detail in your angling, straightening rigs by steaming the hooklink, and checking the position of the silicone on the hook between every cast!
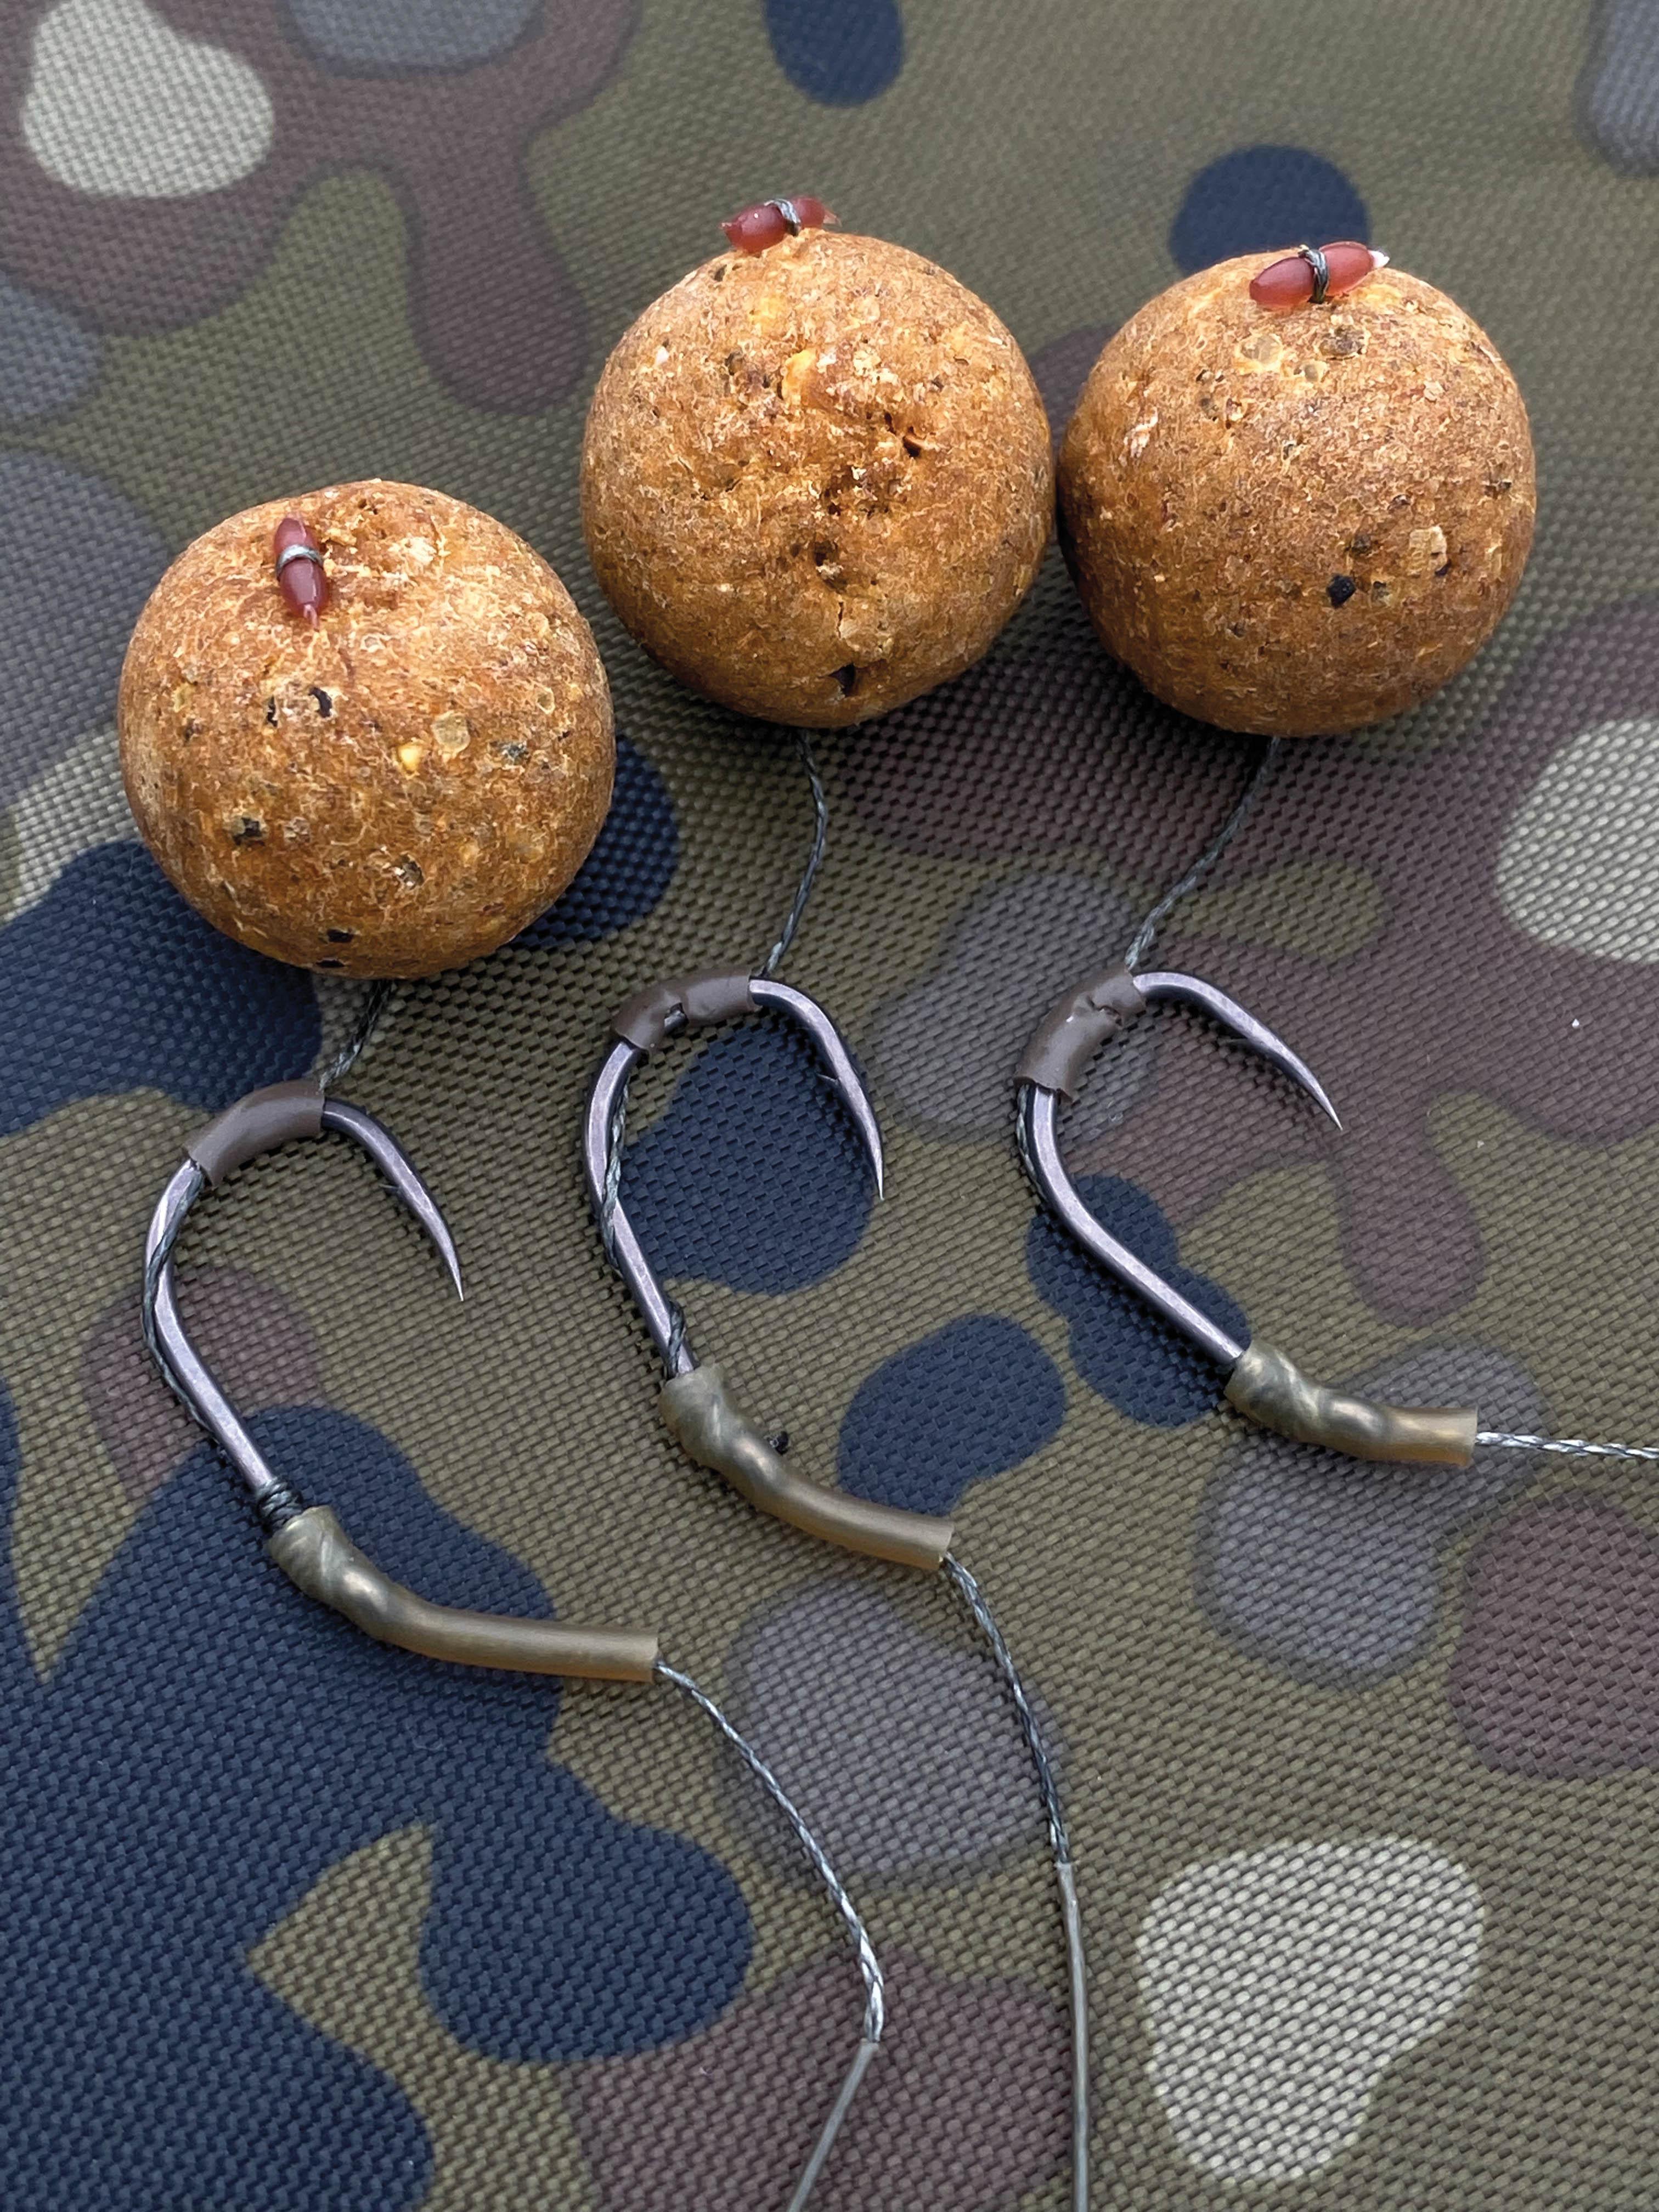
Consensus amongst many Flipper aficionados is that the rig works best, relatively short—certainly no more than 8-inches long (that’s 20cm to the kids). As such, it is at its most effective, the hooklink tightening for the ‘flip’ to flop over. I’m sure by now you all have a firm handle on skinned hooklinks, i.e. where to strip them and by how much, to allow the hook to move unimpeded. A nice heavy hooklink like TA’s original Tungskin is ideal, but do not be afraid to experiment, as the world really is your oyster when it comes to rig construction.
When considering hook sizes for baits, a simple starting point would be a size 6 combined with a 16mm hookbait, and a size 5 with an 18–20mm bait. If you use your nouse, it is easy to extrapolate the correct size of hook for particle hookbaits, doubled small boilies or other change hookbaits; just look to see that the rig appears balanced.
Logically, bigger baits mean heavier baits. Heavier baits should afford greater enhancement of the rig’s function, and even fewer tangles. This all seems true to a certain extent, but having fished donkey-choker hookbaits years ago, I feel compelled to issue a mild warning to big-bait virgins. A boilie of 24mm or larger can cause all sorts of issues in terms of your rig surviving the cast unscathed. The large diameter of the hookbait results in a much bigger impact as the rig hits the surface, and in this case can cause the silicone to move, kink the hooklink, and undermine the TLC already applied during careful construction. Then again, a boat drop circumvents this, so if rules allow rig drops, it’s not an issue.
With large hookbaits—over 22mm, say—there is little point going bigger and bigger on hook size. Stick to a good reliable size 4 and adjust the length of the Hair to accommodate the larger diameter bait.
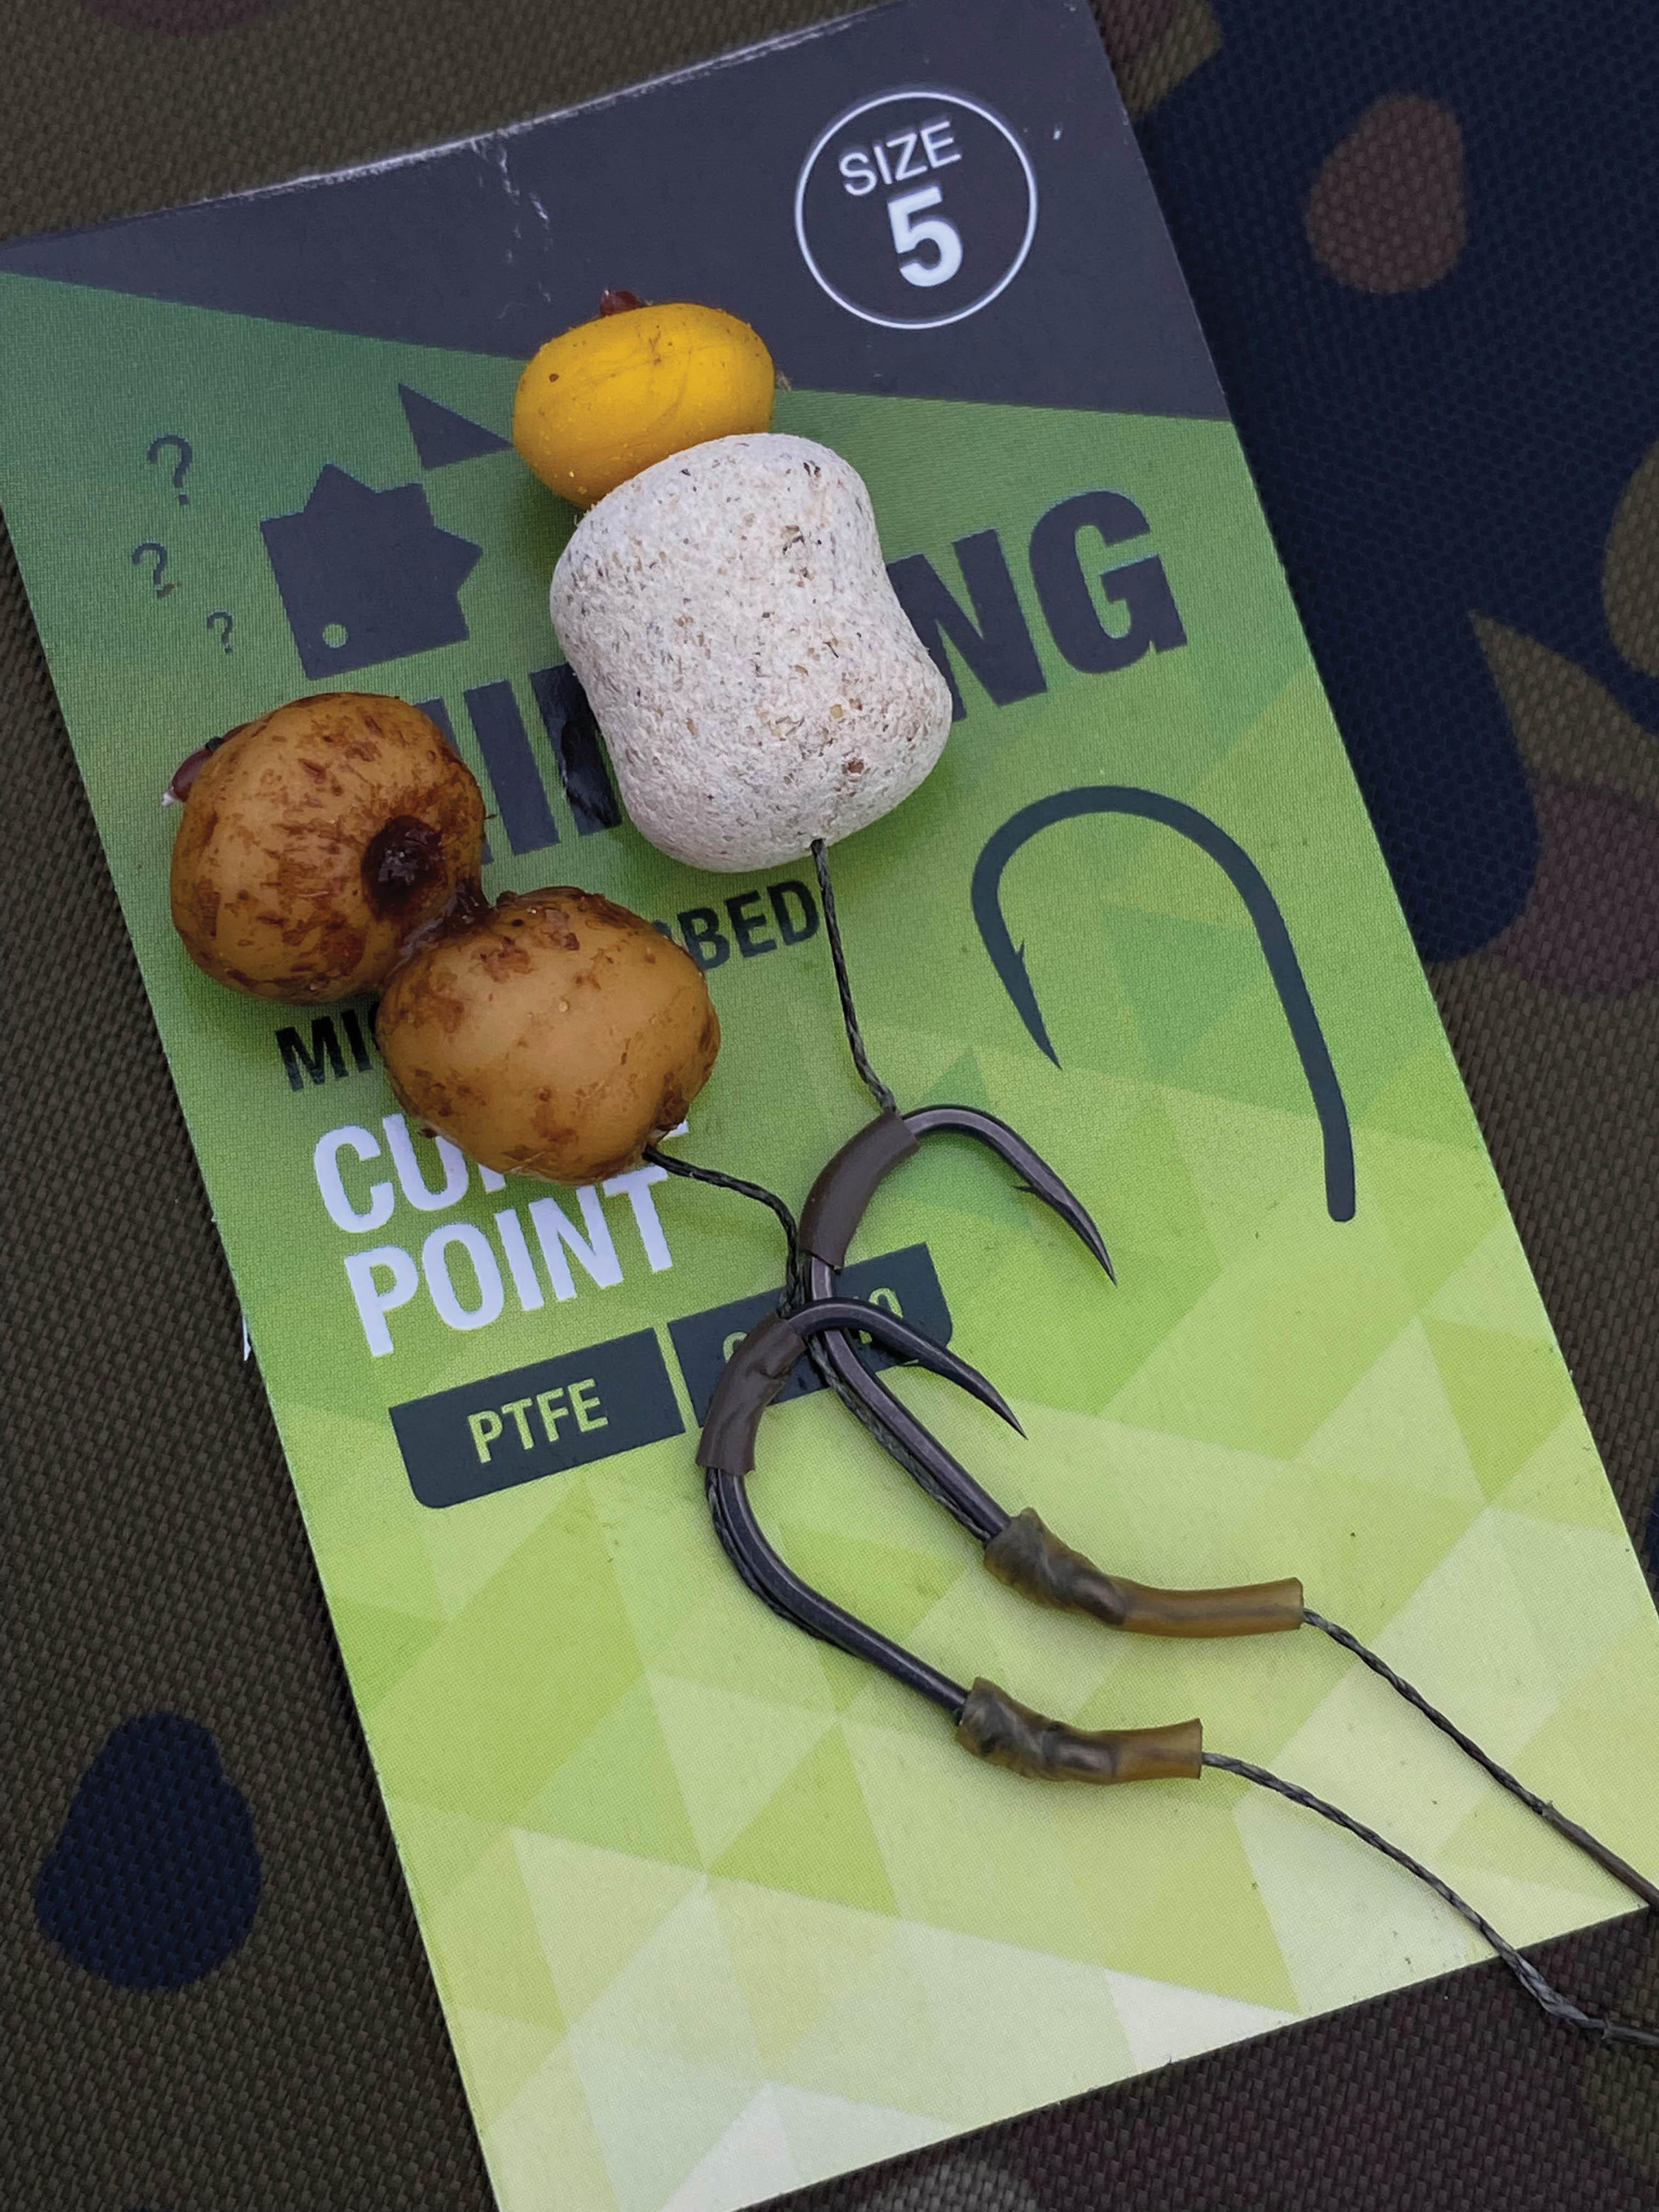
Macro Tweaks - The key areas to ensure you get 110% right
Hook patterns and size
The world is your oyster. By adjusting the length and angle of the kicker, almost any hook can be made to work, but for starters, try a simple wide gape pattern like the awesome TA Curve Point. Recommended hooks for different sizes of boilie would be a 6 for 15mm baits, and 5 for 20mm.
Hair length
A sensible starting point would be for the gap between the silicone and the hookbait to be the same as the diameter of the hookbait. If you want to shorten the Hair, you can wrap the excess material around the hook shank. Be mindful, and allow enough of a gap for separation, so that the hook settles inconspicuously next to the hookbait.
Hooklink material
This is a rig that works best with a full braid, such as Duo-Fleck; or a partially stripped, skinned hooklink like Camstiff, Camsoft, or the awesome Tungskin—the original and still the very best.
Hooklink length
As the rig relies on the hooklink tightening to draw the arrangement down and on to the carp’s lip, its best fished relatively short, relative to the nature of the lakebed you position it on—six- to seven-inches is an ideal starting point.
Best way to trap the Hair
Just a couple of millimetres of 0.5mm silicone is perfect for the job. This will hold the Hair nicely, but will also allow movement as the hook embeds, ensuring that the hook-hold isn’t impeded.
Kicker length
The shrink-tube kicker should cover and extend beyond the eye by at least a couple of millimetres. Depending on the pattern of hook used, I would suggest that the kicker should not extend further than it being aligned with the hook point, allowing for either a straight or curved point.
Kicker angle
If the hook has a slightly inturned eye, then start off by broadly following the natural angle to maximise the working gape of the final presentation. Having said that, there’s plenty of room for experimentation, and a more aggressive angle will work too. Simply factor the kicker length and angle into your decision.
Suitable hookbaits
Boilies straight out of the bag, hardened hookbaits and barrels are all ideal, but remember, you would be crazy to ignore a cheeky nut trap.
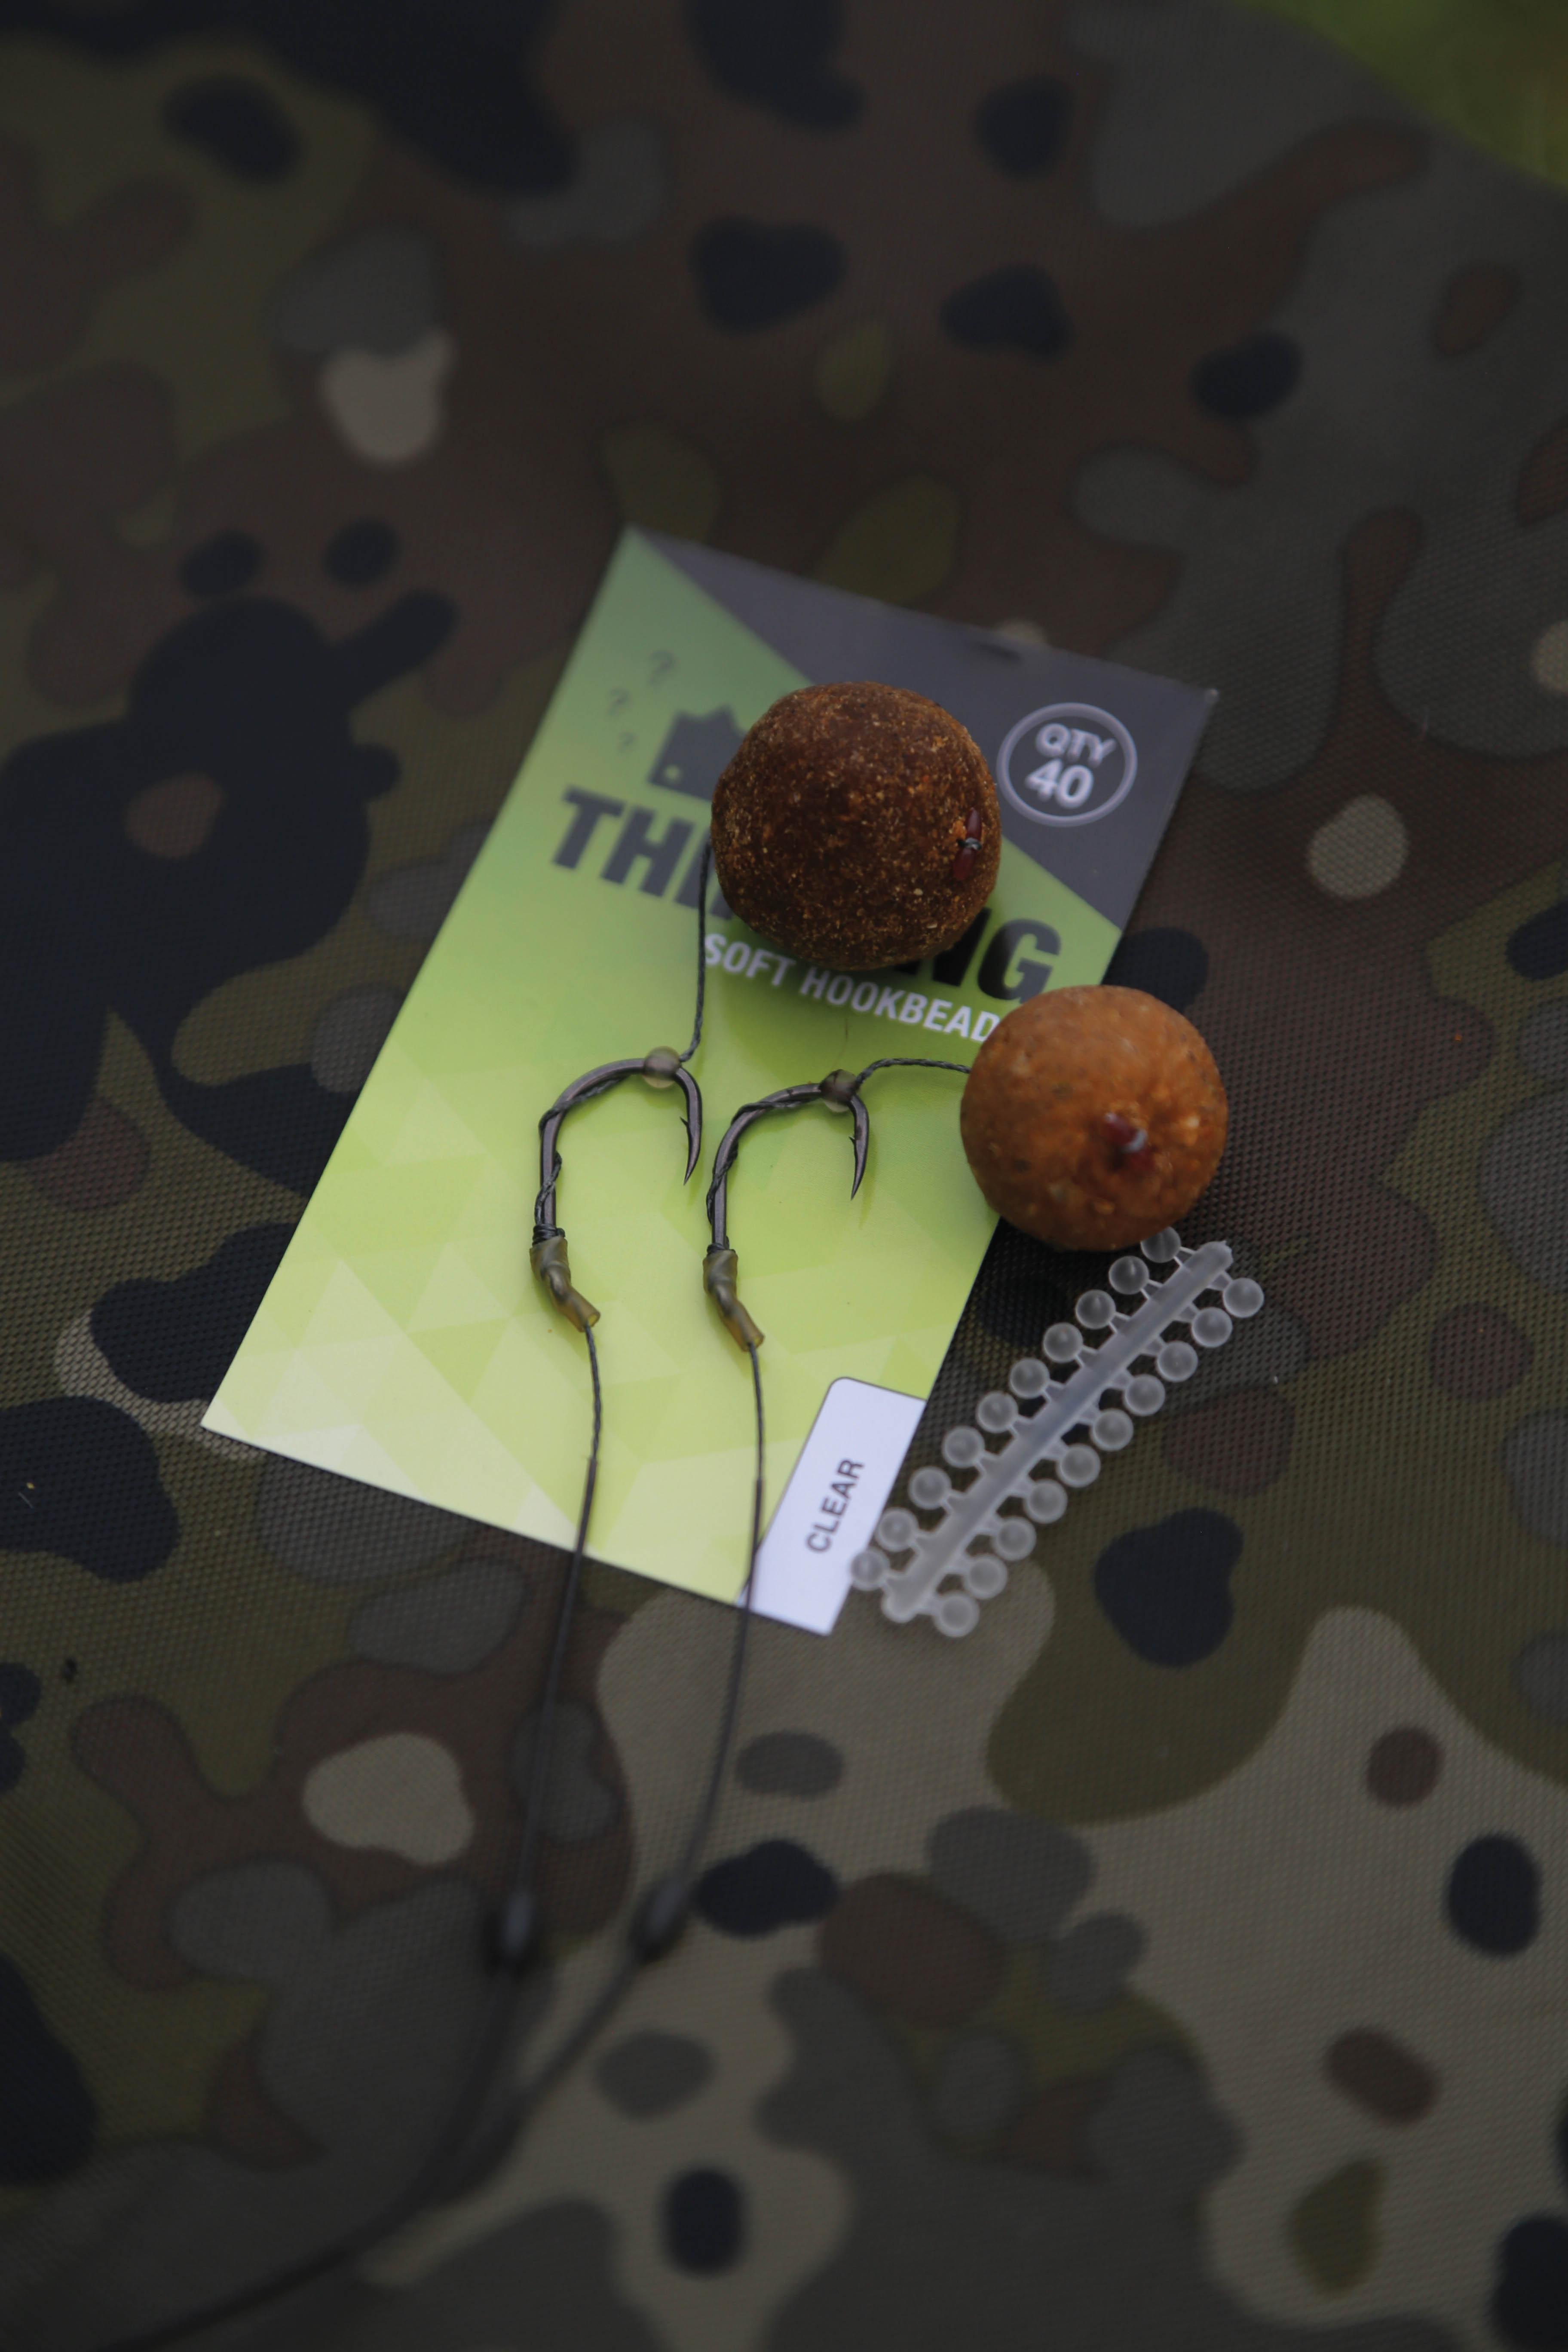
With large hookbaits—over 22mm, say—there is little point going bigger and bigger on hook size. Stick to a good reliable size 4 and adjust the length of the Hair to accommodate the larger diameter bait.
As I have already alluded to, the use of a non-balanced, spherical, heavy hookbait potentially creates issues in terms of maintaining the consistency I always strive for—it is enough to make me go all giddy (and reach for a paper bag to breath into to stop me from hyperventilating!). But I also recognise that this specific combination works amazingly well. In fact, the most capable anglers I know who use, and love this presentation, don’t seem to share my concerns about round baits, specifically the fact that they never seem to settle uniformly.
How has my rig paranoia run away so badly, to such an extent that I can no longer see the wood for the trees? You see, in my mind, it only takes the hookbait to land on a stone for the inherent weight of the bait to force the hookbait to settle in such a way as to leave the hook hanging awkwardly from the side of the bait. Eek! At best, it will look nasty; and at worst, it could render the rig less able to do its job, as the carp can simply avoid eating the one boilie that looks like it has a dirty great hook hanging from it!
Luckily, there is an easy solution, and that is the use of double, or barrel-shaped hookbaits. In fact, just before writing this piece, I had a quick browse on the internet, and I noted that the messiah (yes, Terry H) shows the rig primed with a dumbbell hookbait on the Hair. I am guessing that the logical reason was to incorporate a significant level of control in respect of how the hook and the hookbait then orientate nicely, side by side, as dumbbells are far more likely to lay horizontal to the lakebed; that seems to be a reasonable supposition anyway.
Finally, I realise that I haven’t mentioned Hair length—sorry! I am no fan of hideously long Hairs, but be assured, there is a Goldilocks length, related to the size and shape of the hookbait. The key is to make sure that when the hookbait settles, the hook lays flush with the lakebed. That necessarily means a little bit more separation than you would have with a balanced hookbait, so a gap broadly similar to the diameter of the boilie being used is about right. Not too long, and not too short… just perfick!
